This post is in partnership with DripWorks. All thoughts and words are my own.
In my last post, I went over why you should install a drip system, what a drip system even was, and what makes it a more versatile system than soaker hoses.
Now you’ll learn how to install drip irrigation in your own raised bed vegetable garden because in my view, this is one of the most valuable lazy gardening strategies you can employ in your garden—a strategy that lets you grow more food with less effort!
For most people who have never installed a drip system, choosing an all-inclusive garden bed irrigation kit is an ideal way to go. All you need are a few raised beds and a faucet nearby, and you’ll have everything you need to equip your garden before spring arrives.
Well, not quite everything. If you want to automate your watering, which is probably a major reason you’re installing drip in the first place, you’ll need a separate timer. You may also realize that you still want the option of watering with a hose, and may need to comply with city regulations pertaining to backflow prevention. Backflow prevention keeps your irrigation from contaminating the water supply. (To find out if your city has a program in place, call the public works department or Google your city name plus backflow prevention.)
These were all of my needs, so the system that DripWorks sent me to try included:
- Garden Bed Irrigation Kit
- Galcon Easy Program Flip Open LCD Timer (I also have the Galcon LCD Timer for my second faucet, but prefer the first one)
- Brass Vacuum Breaker
- Brass Hose Y with Valve
So, what do you get in the garden bed irrigation kit?
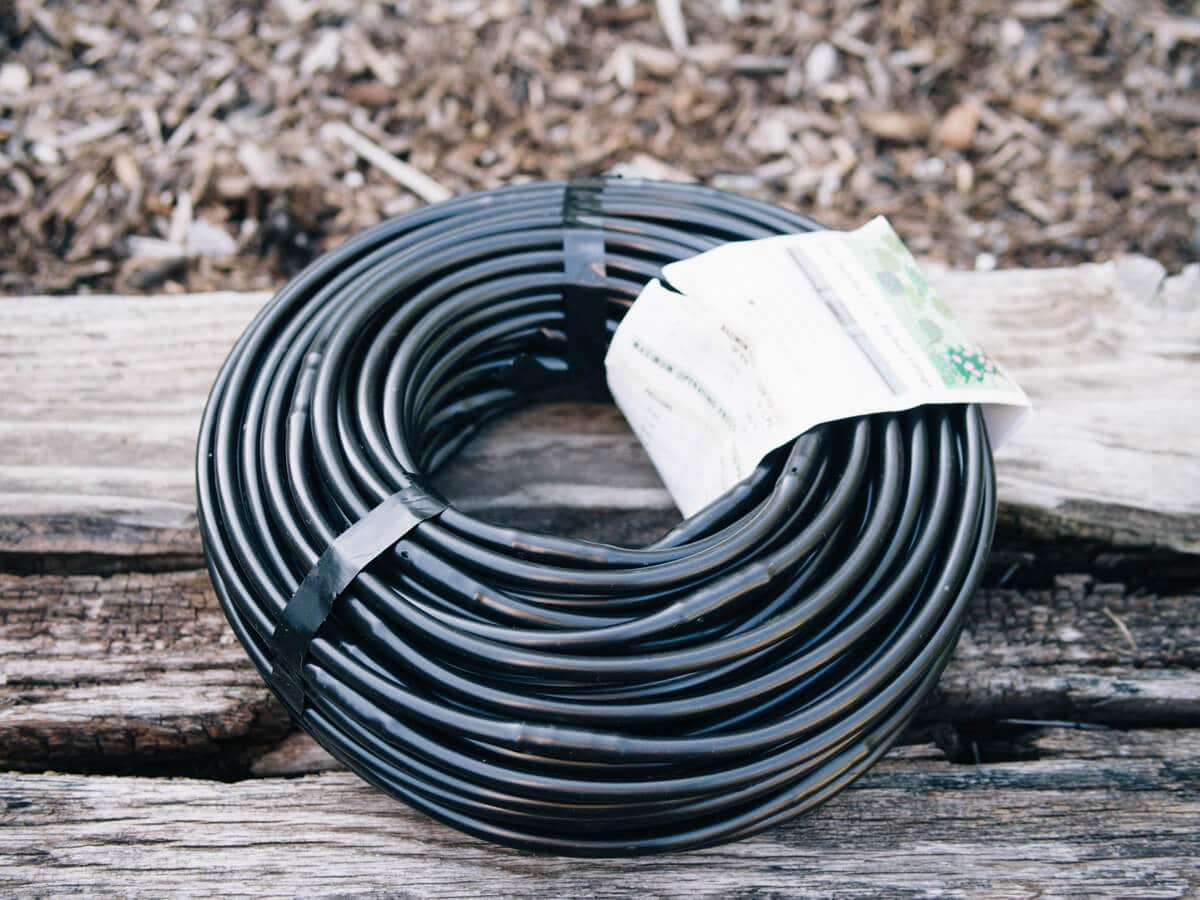
First, there’s a roll of mainline tubing. This is the backbone of your drip irrigation system, which all components attach to and run from.
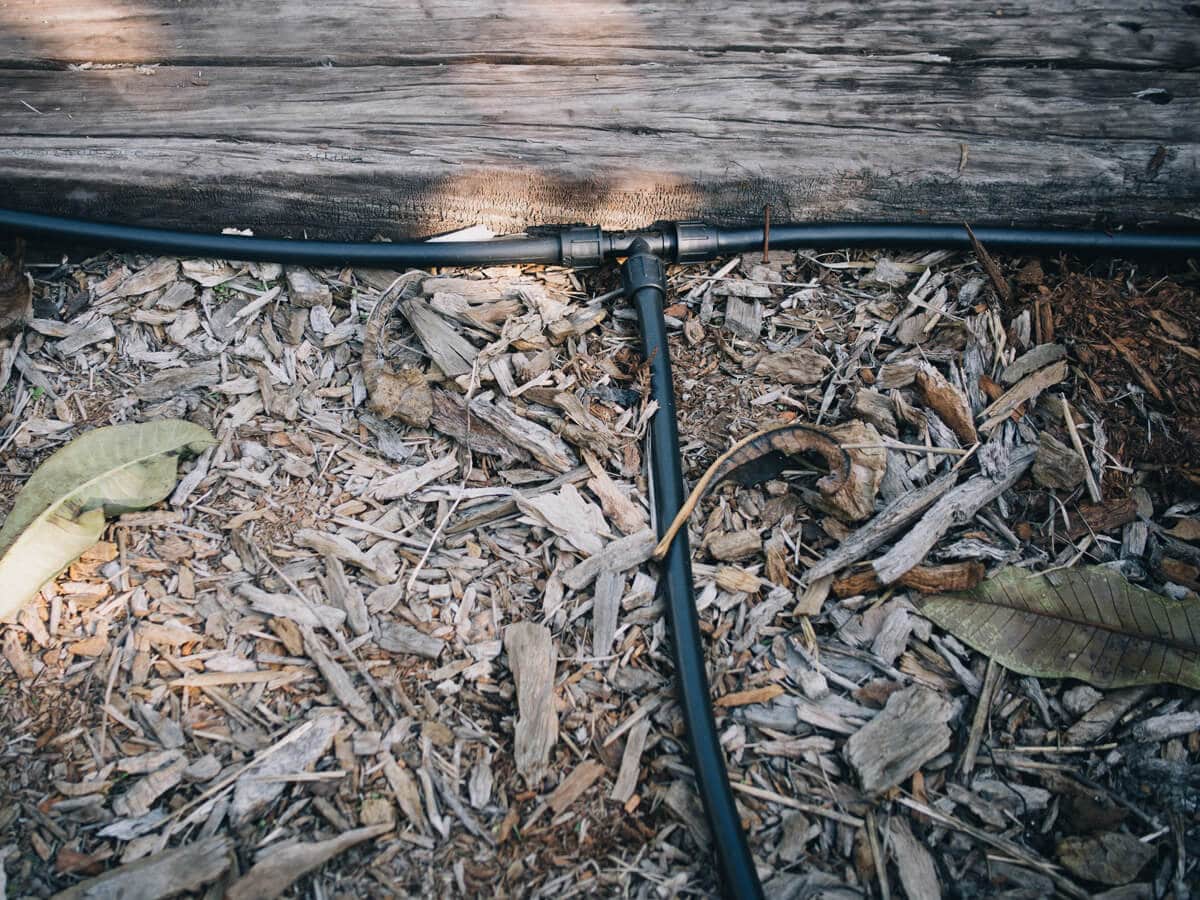
Similar to the mainline tubing is the micro tubing, which is a much thinner and more flexible version that serves the same purpose of delivering water to your emitters.
An emitter is the part that then delivers water to your plants. Emitters essentially dribble water where they’re placed, and there are several different types suited for different areas (for example, those that drip water in the same spot versus those that spray water in all directions).
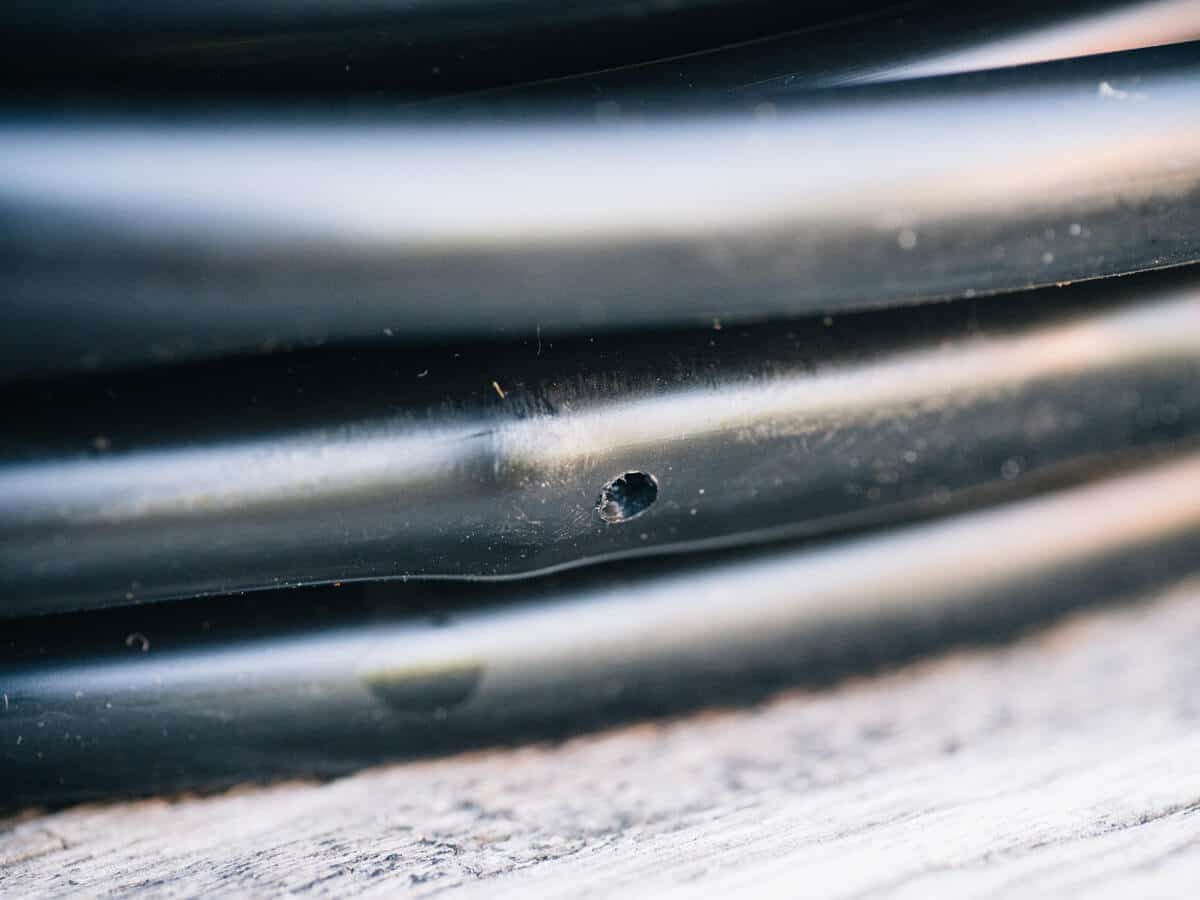
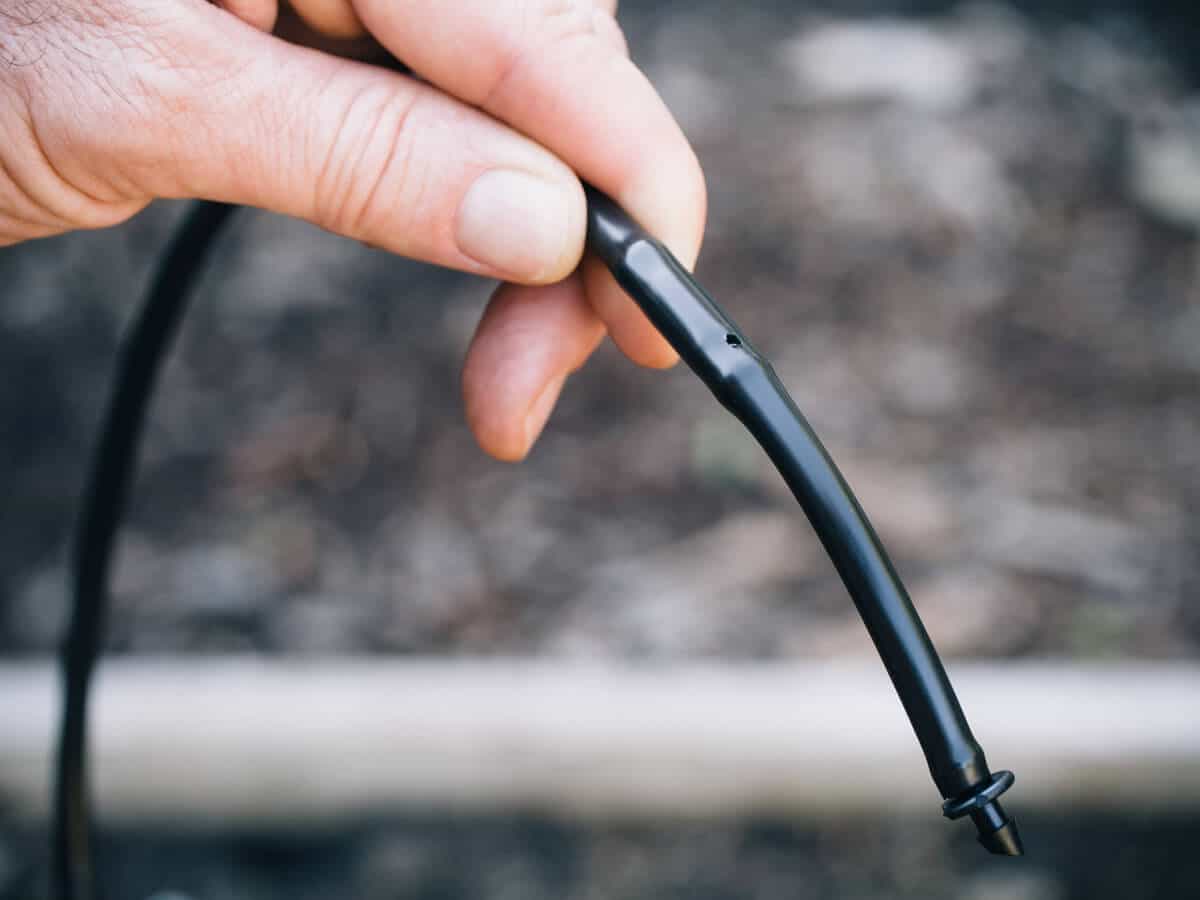
The kit comes with a roll of soaker dripline which has emitters built-in to the line every 12 inches, so you don’t need to affix additional parts.
At first glance, the micro tubing and soaker dripline look very similar—just remember that the dripline has holes drilled into it.
A pressure regulator and home garden filter attaches to your faucet to ensure the proper flow rate of sediment-free water.
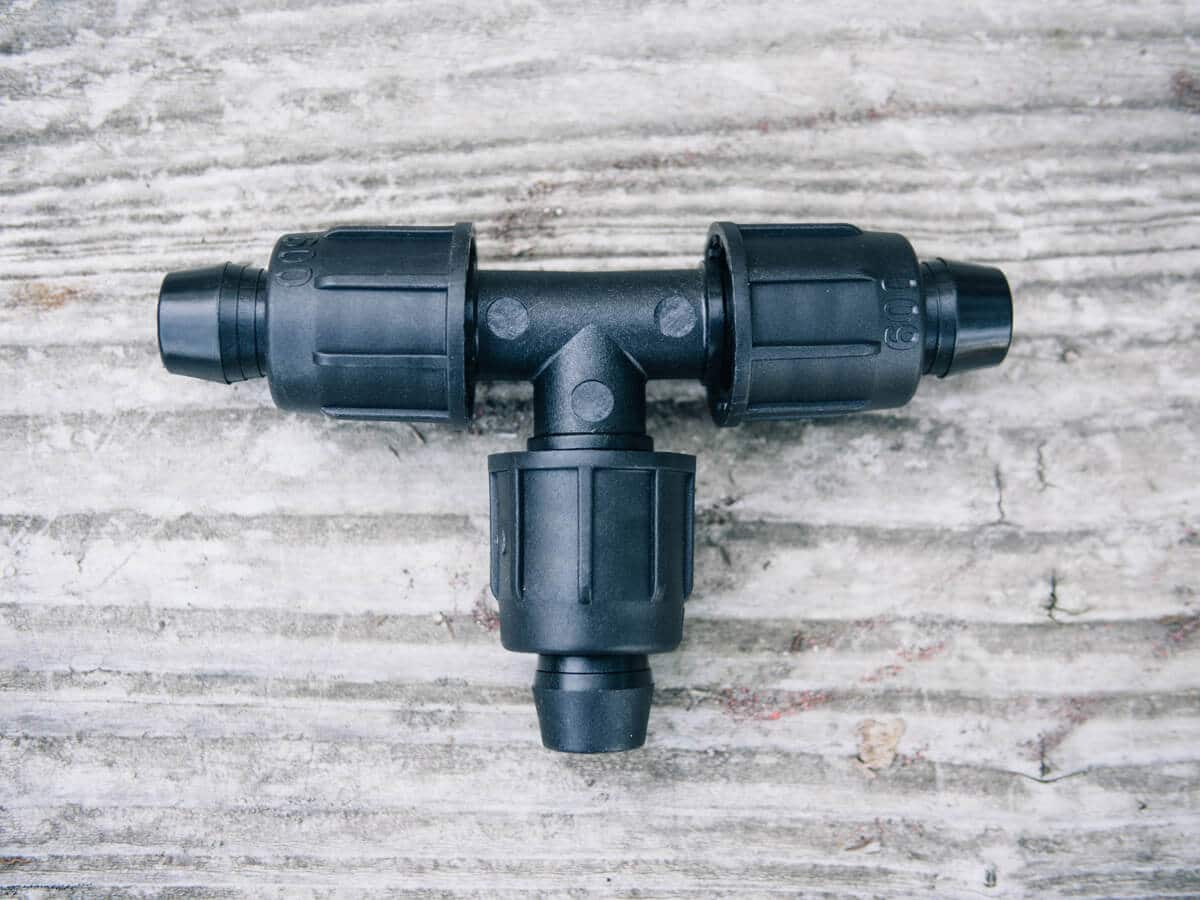
A few different types of Easy Loc fittings attach to the mainline tubing, allowing you to easily connect various branches of tubing together.
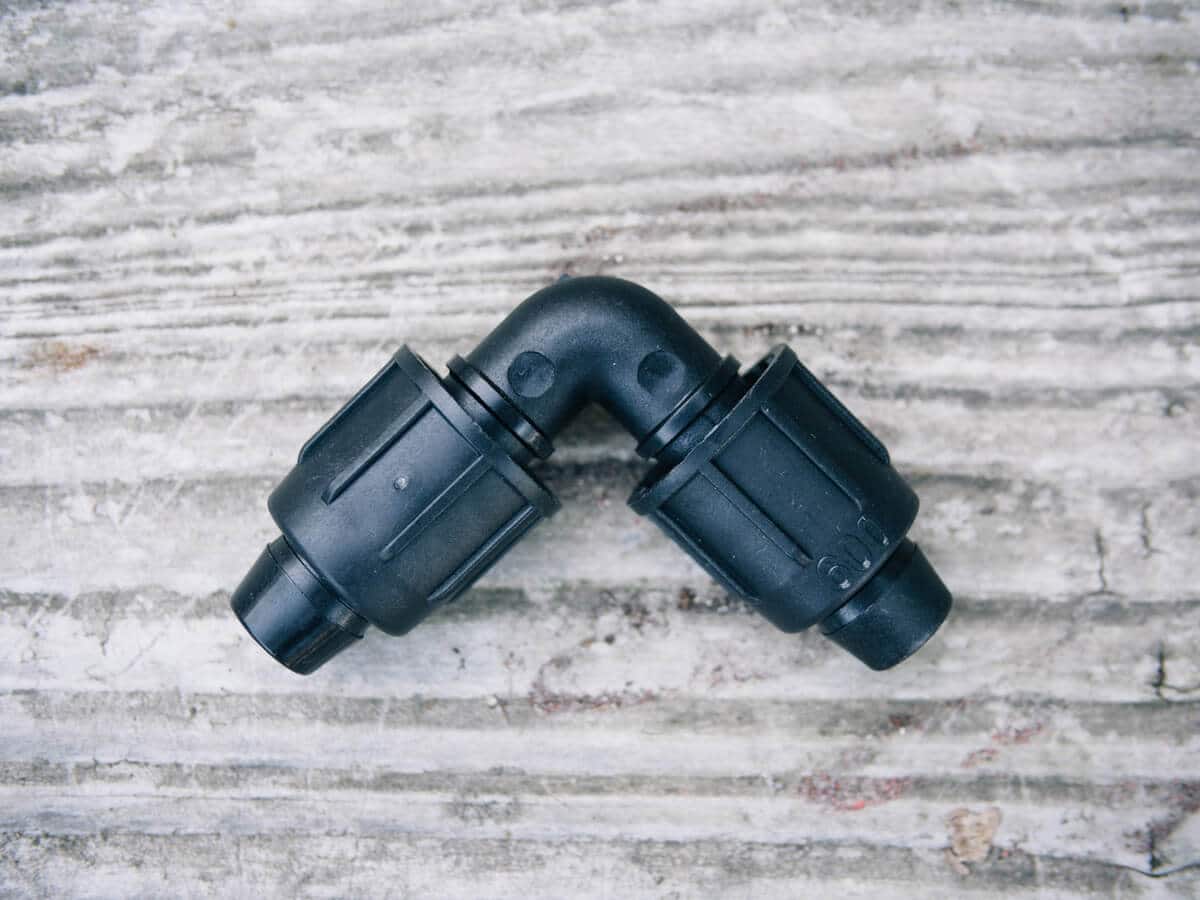
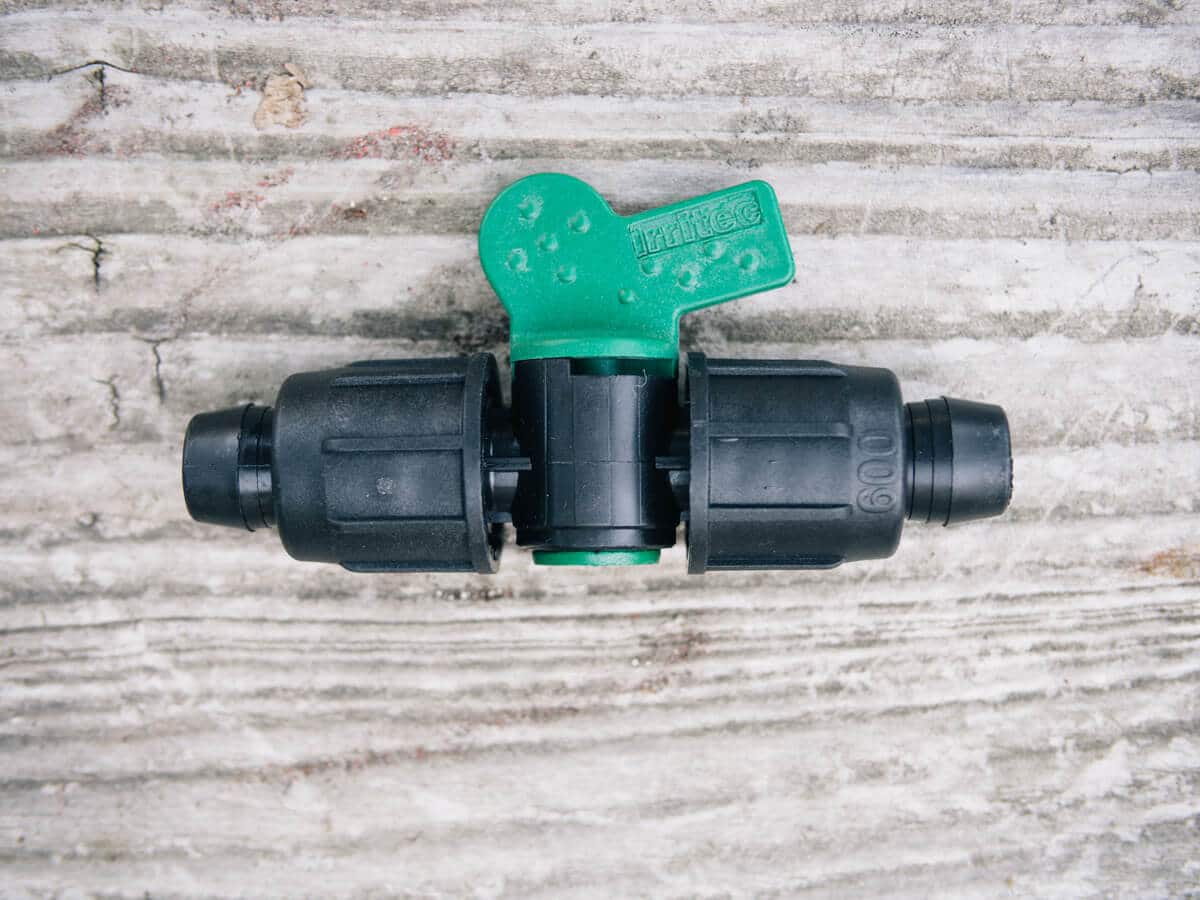
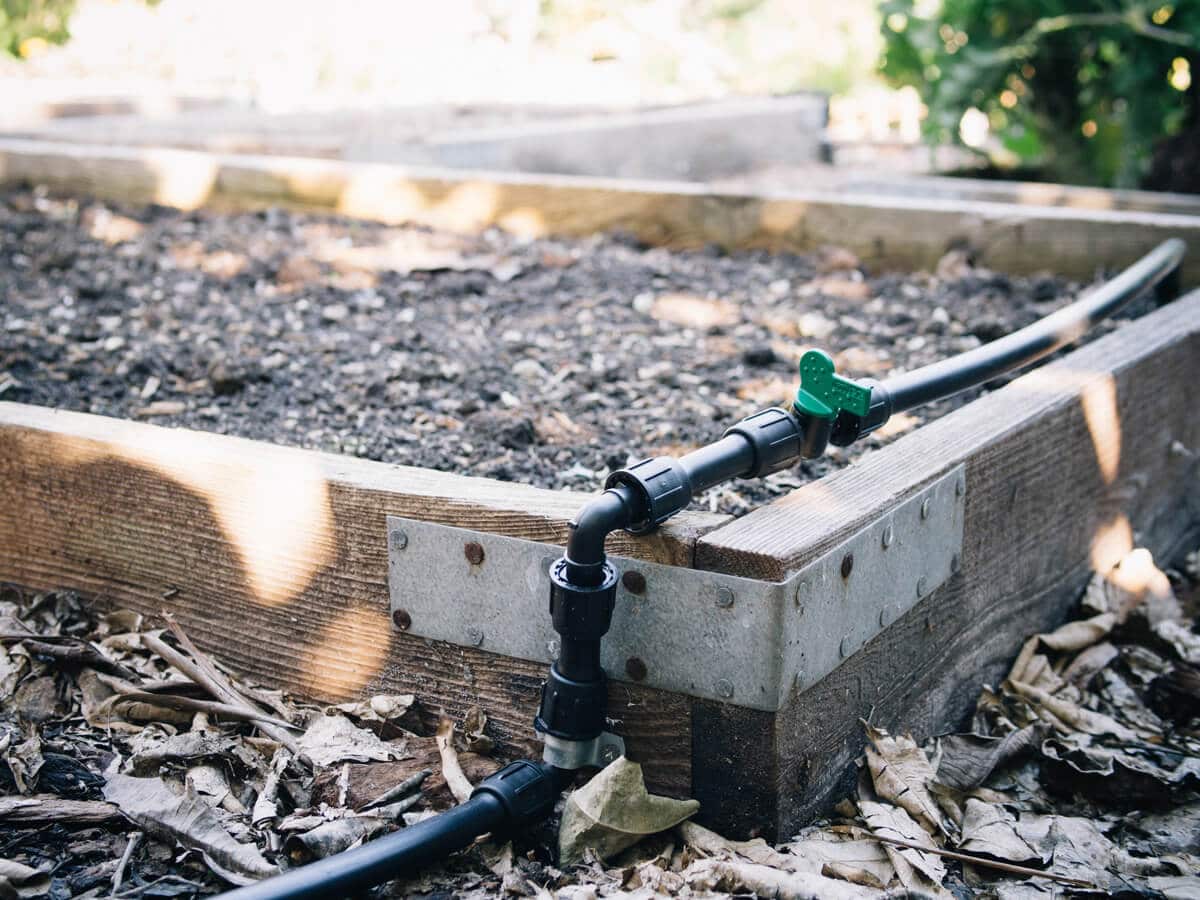
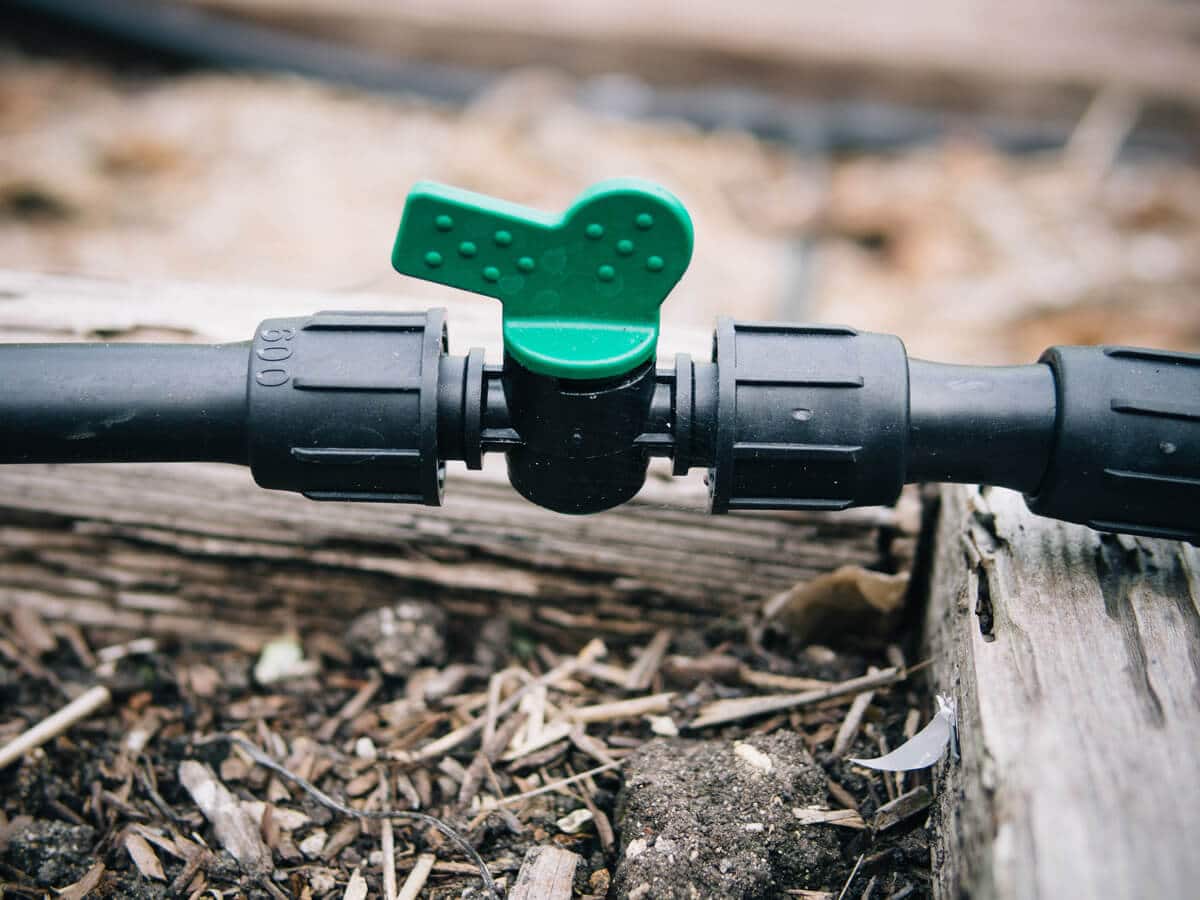
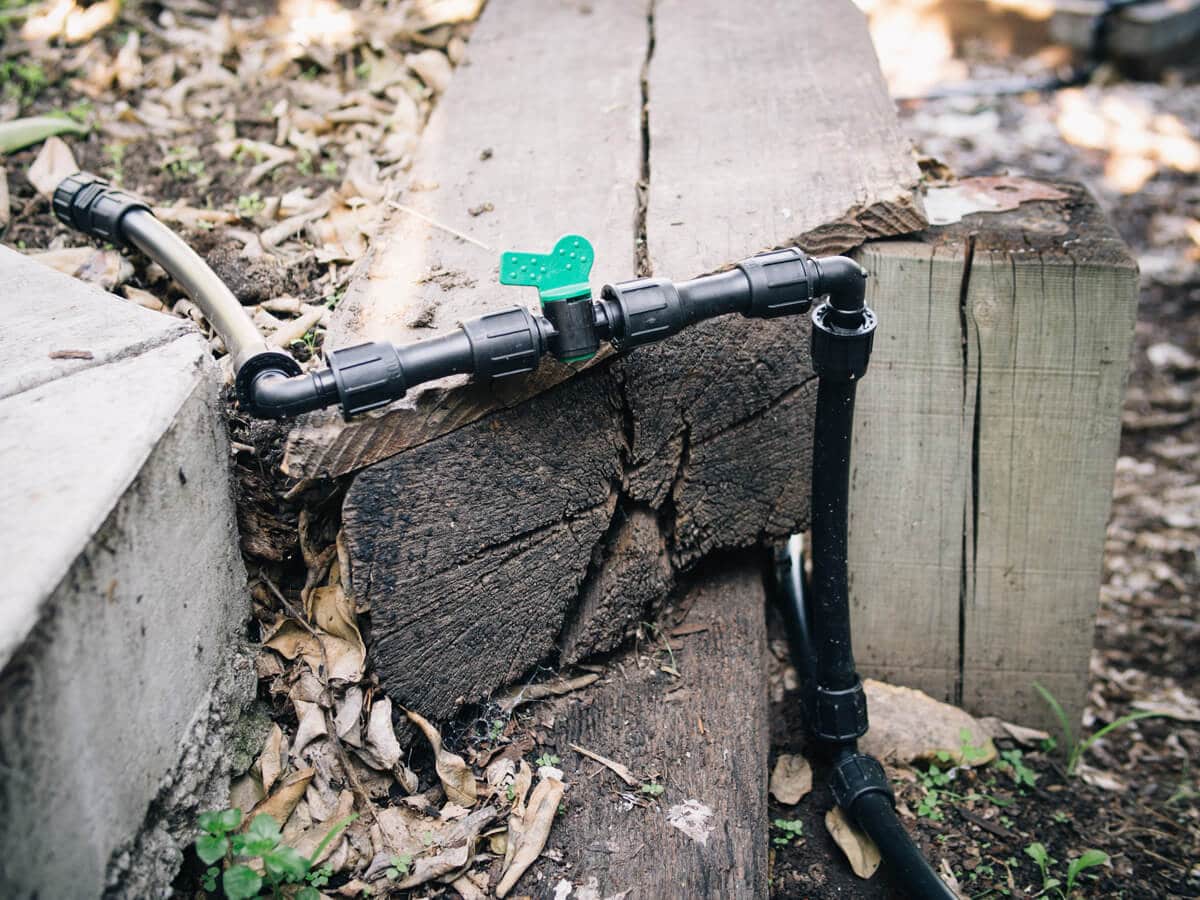
The fitting with the green switch is an Easy Loc with a shut-off valve, which lets you control irrigation to your raised beds. For example, you may want to shut off the irrigation to your garlic bed a couple of weeks before harvest, but have the system continue to irrigate your tomato bed.
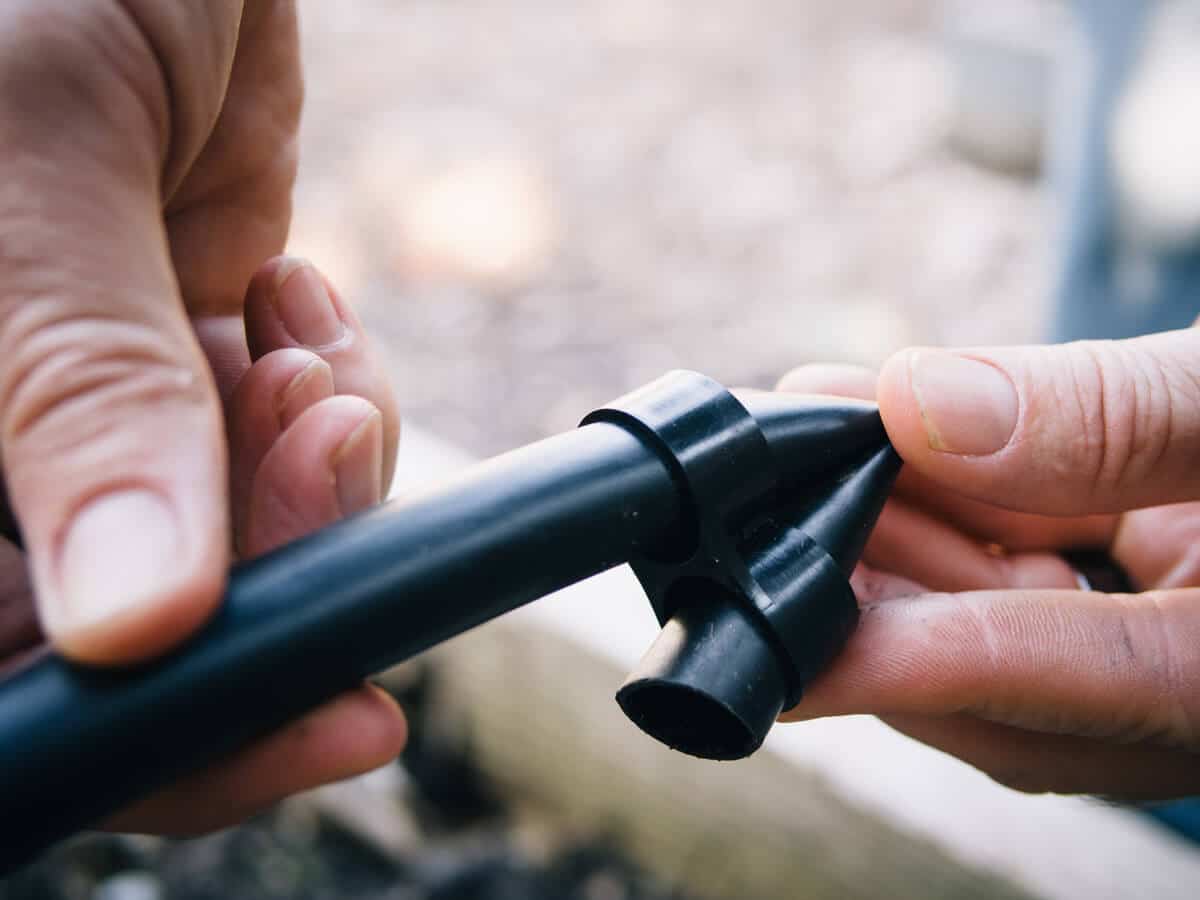
When you reach the end of the mainline tubing, you simply seal off the water flow with a figure 8.
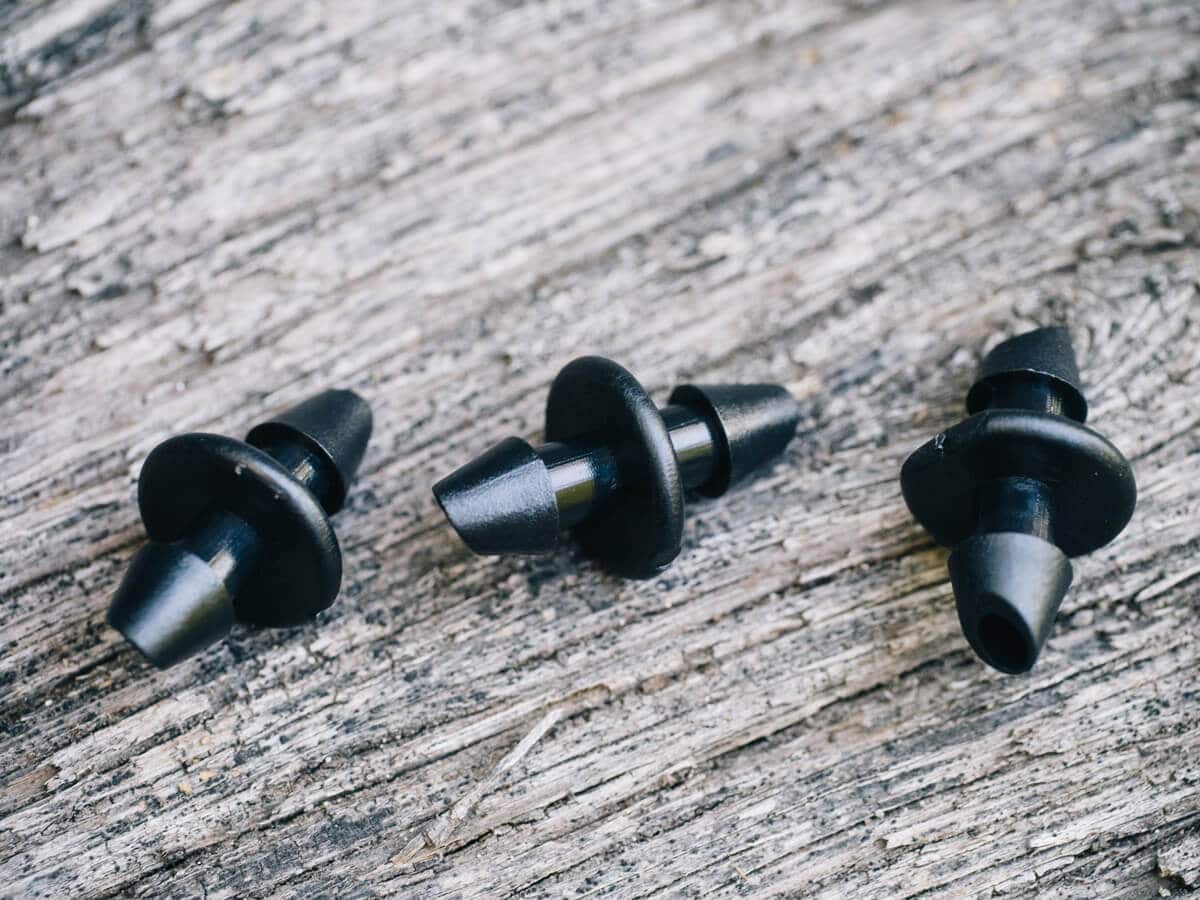
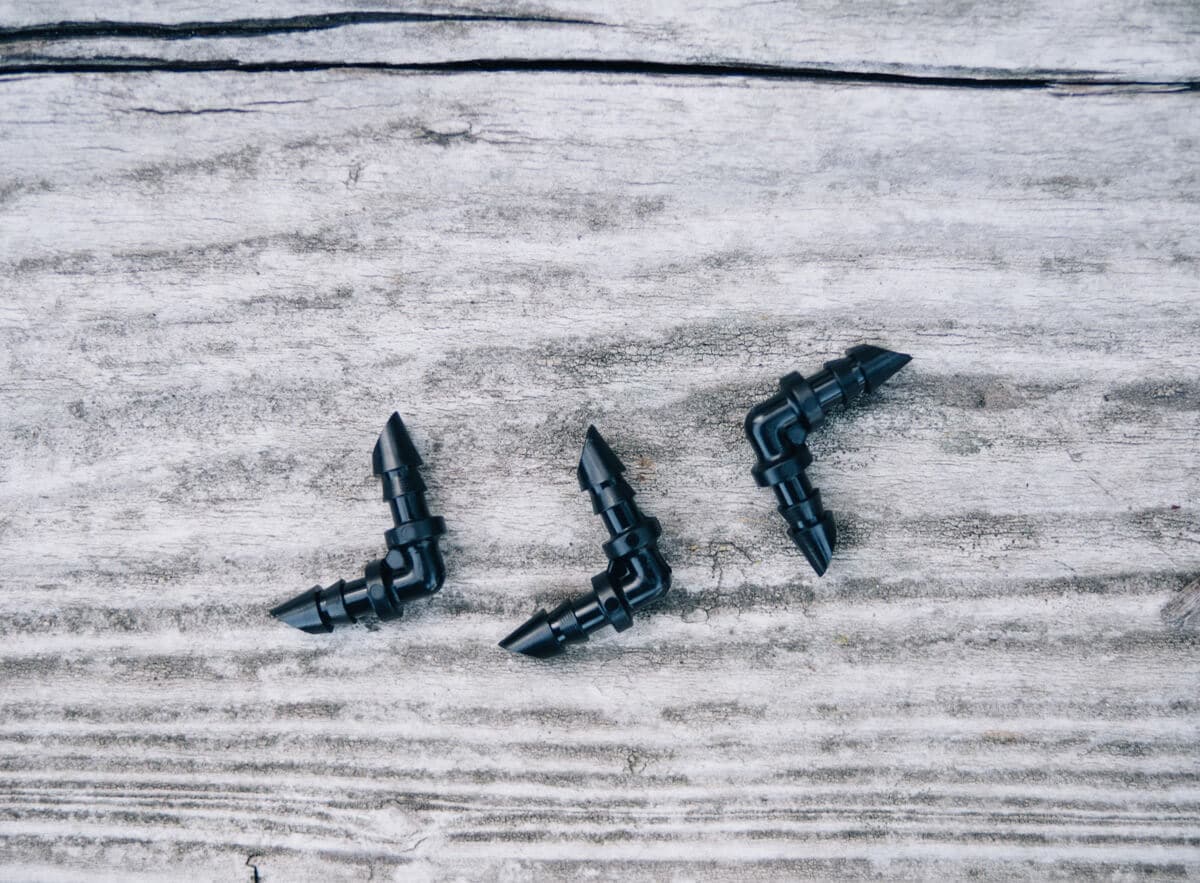
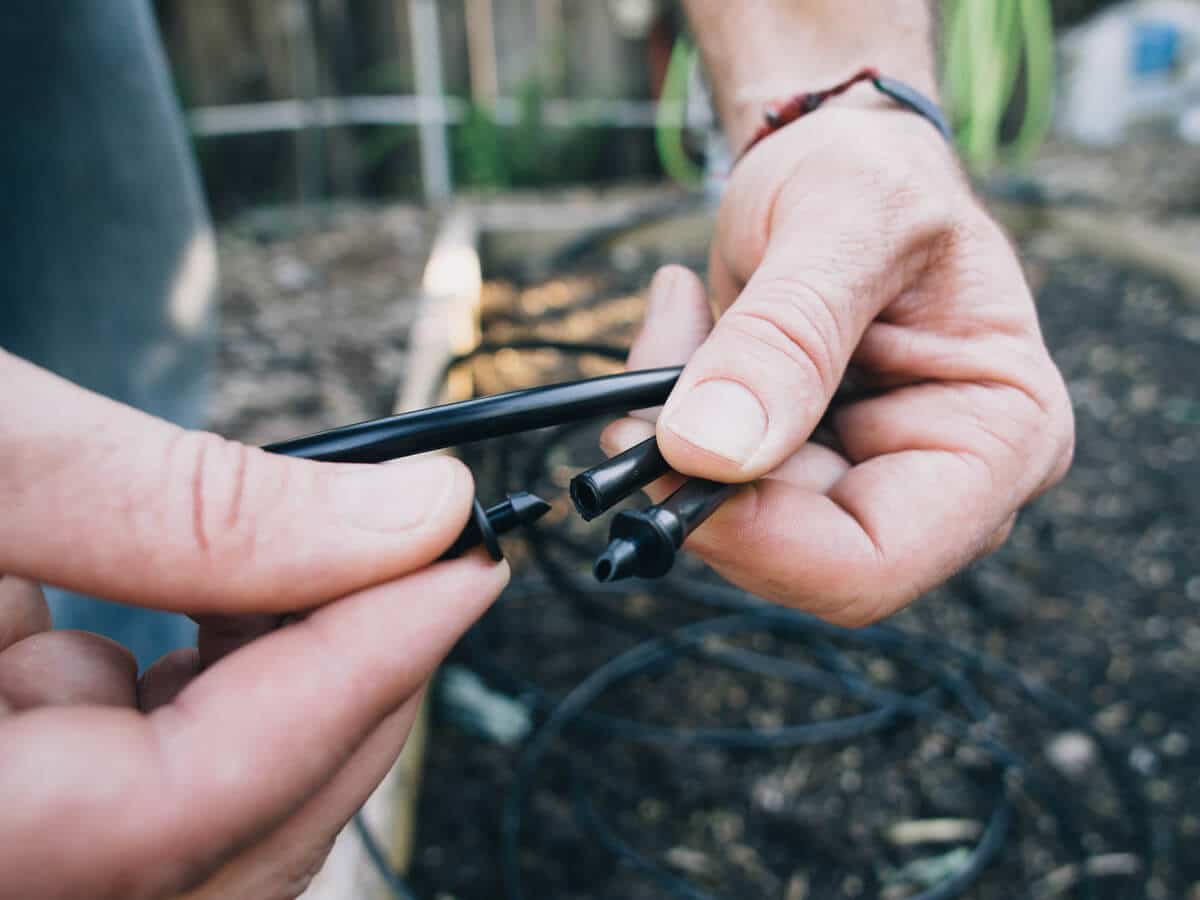
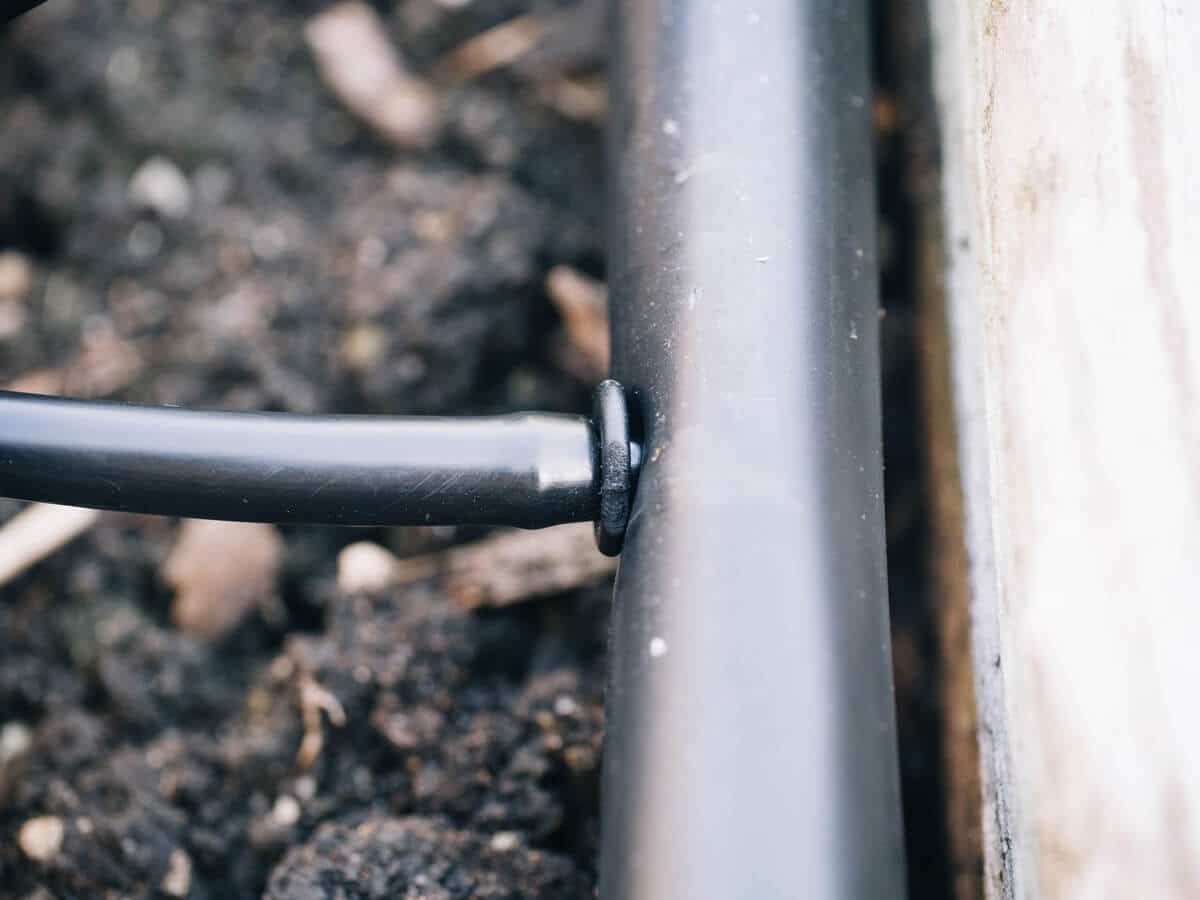
Transfer barbs and elbow fittings work much the same way, only they’re sized for the smaller lines. These tiny connectors enable you to connect the micro tubing and soaker dripline to the mainline tubing.
Still with me so far?
Since the system is fully configurable, you use the included punch to make a hole in the mainline tubing wherever you need to make a connection.
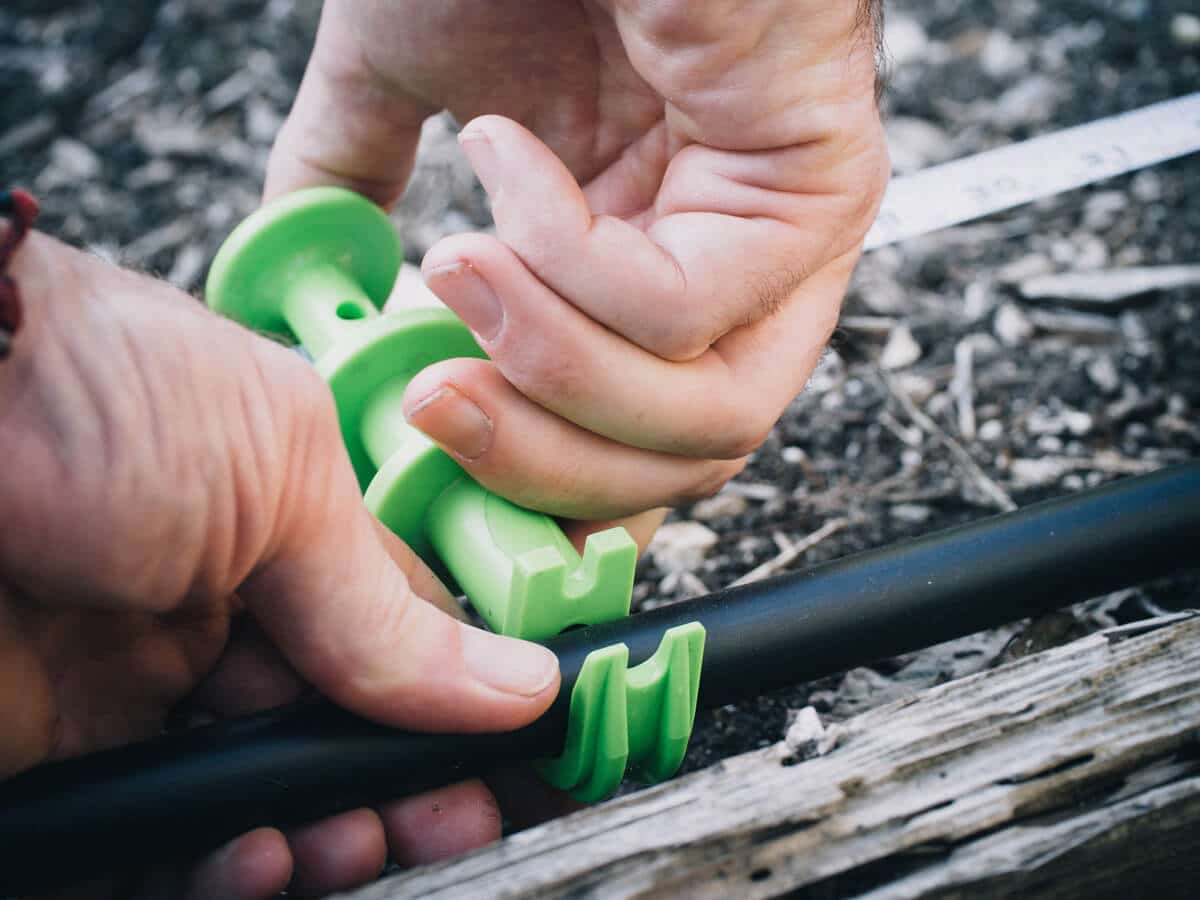
Hold-downs function the same way garden stakes do—they’re meant for securing all your different tubes and lines in the soil.
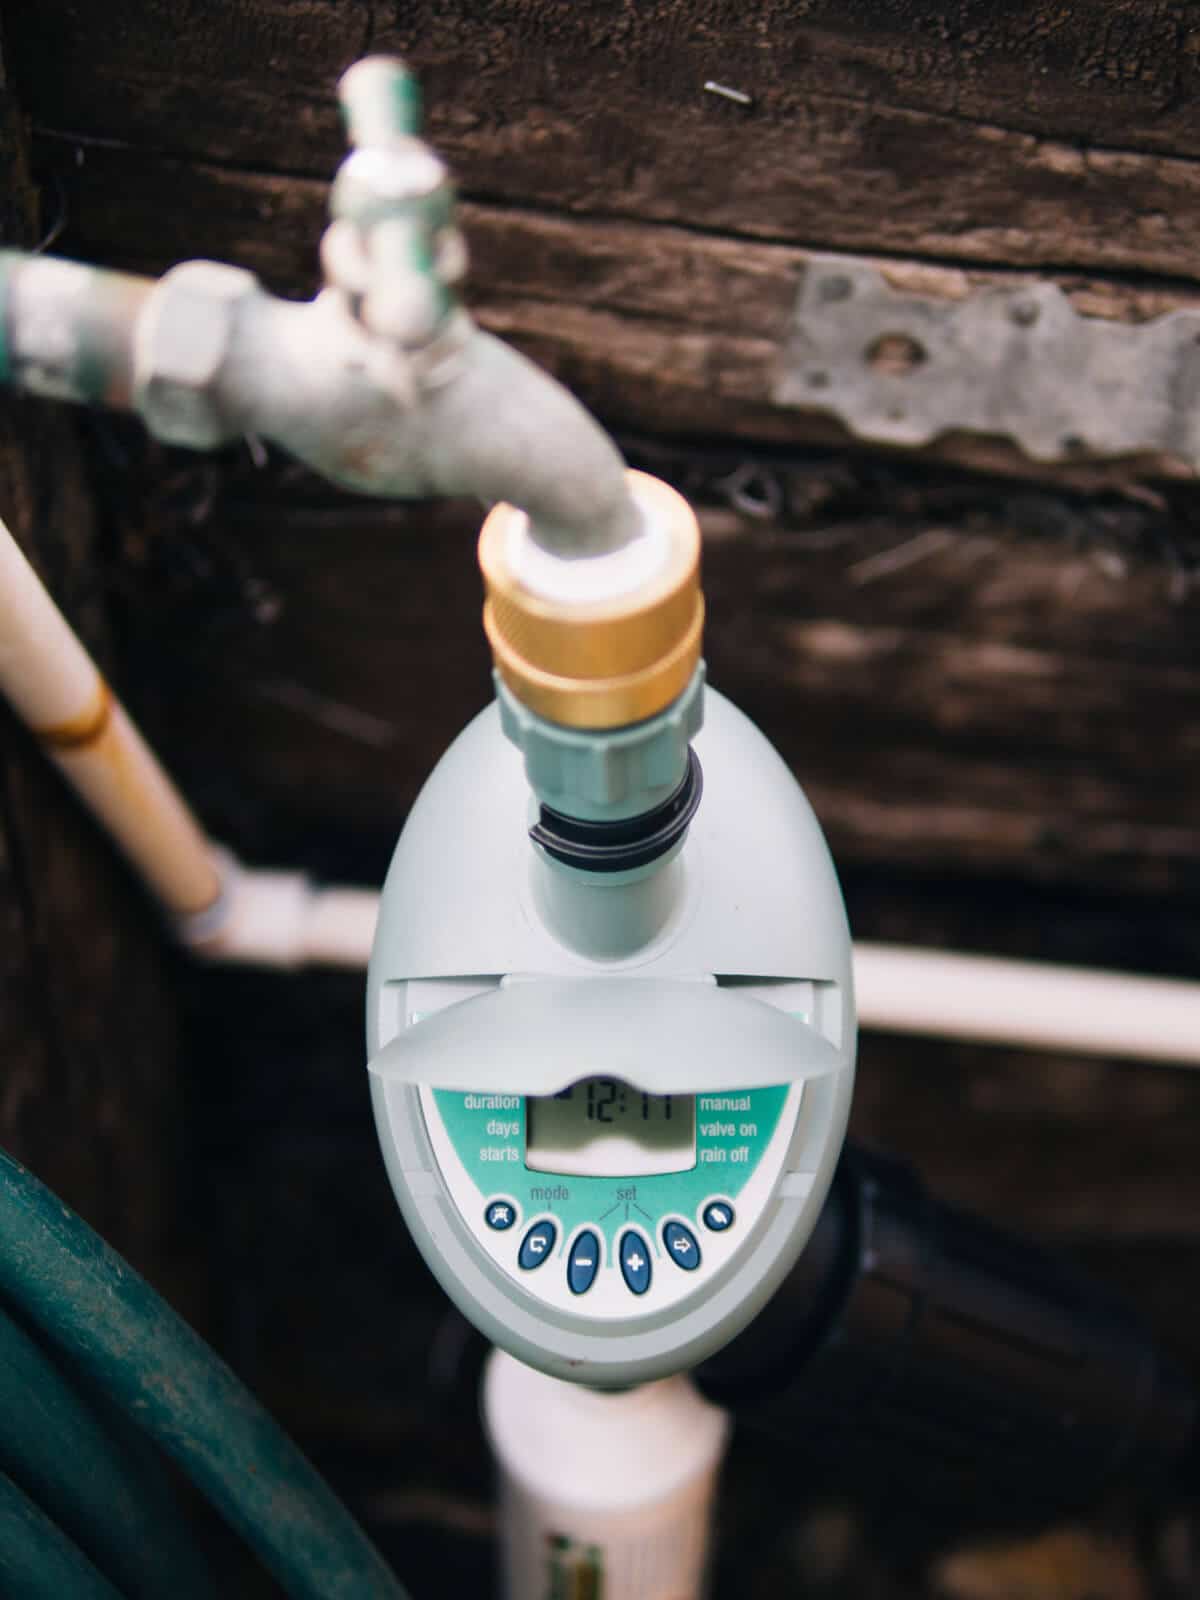
DripWorks sells several types of timers, from solar-powered to direct-wired to battery-operated, but since this was my first system, I opted for the fairly simple Galcon Easy Program Flip Open LCD Timer and Galcon LCD Timer.
While both of them do the job, I found the Easy Program timer to be much more intuitive when accessing the menu and setting my watering schedule.
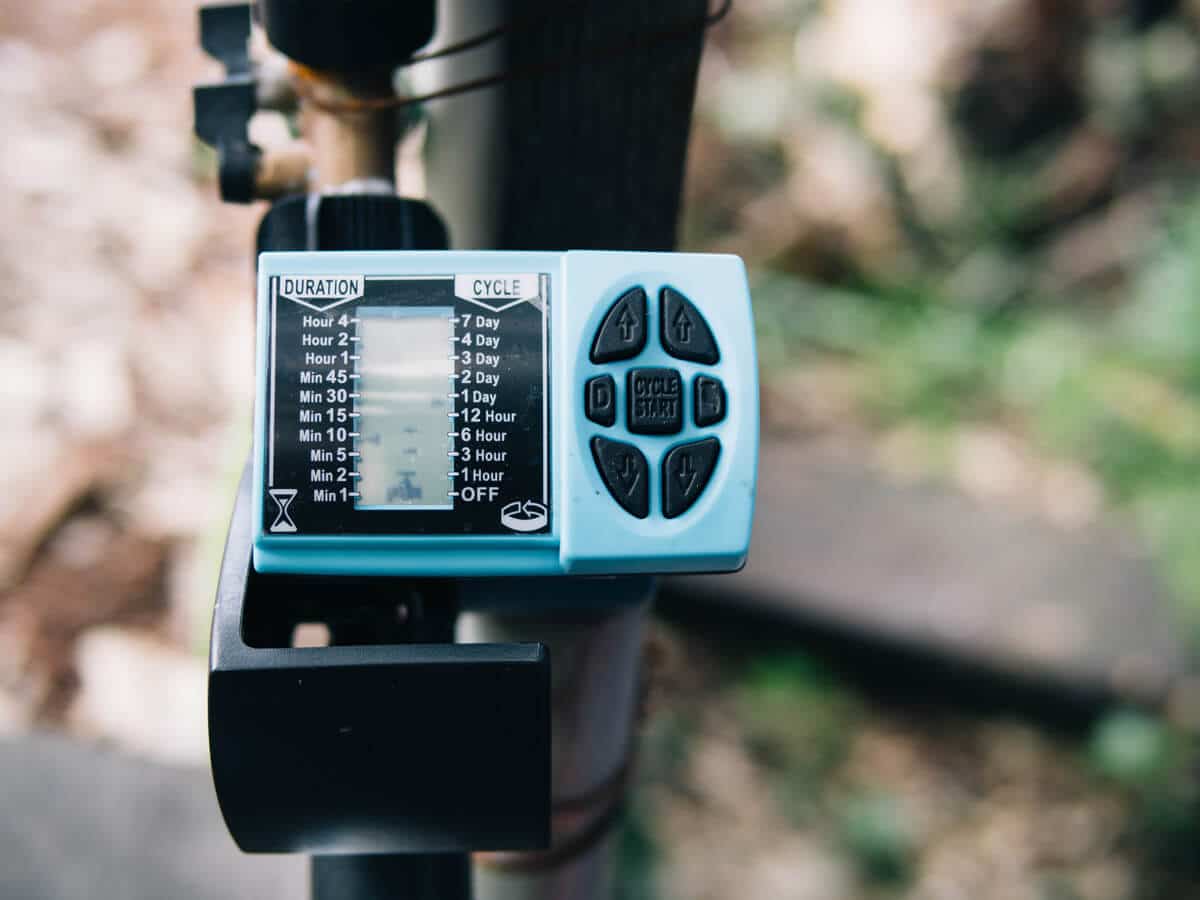
How do you go about choosing the right model for your garden? Honestly, I think this is a question best asked of your DripWorks representative, as it depends on your personal needs and the setup of your system. The two that I went with are the company’s most popular models, so they seemed a reliable choice.
The brass vacuum breaker attaches to the faucet and partially restricts the water pressure and flow so that your irrigation system doesn’t backflow into the water supply. This is another optional add-on, but may be required by your city.
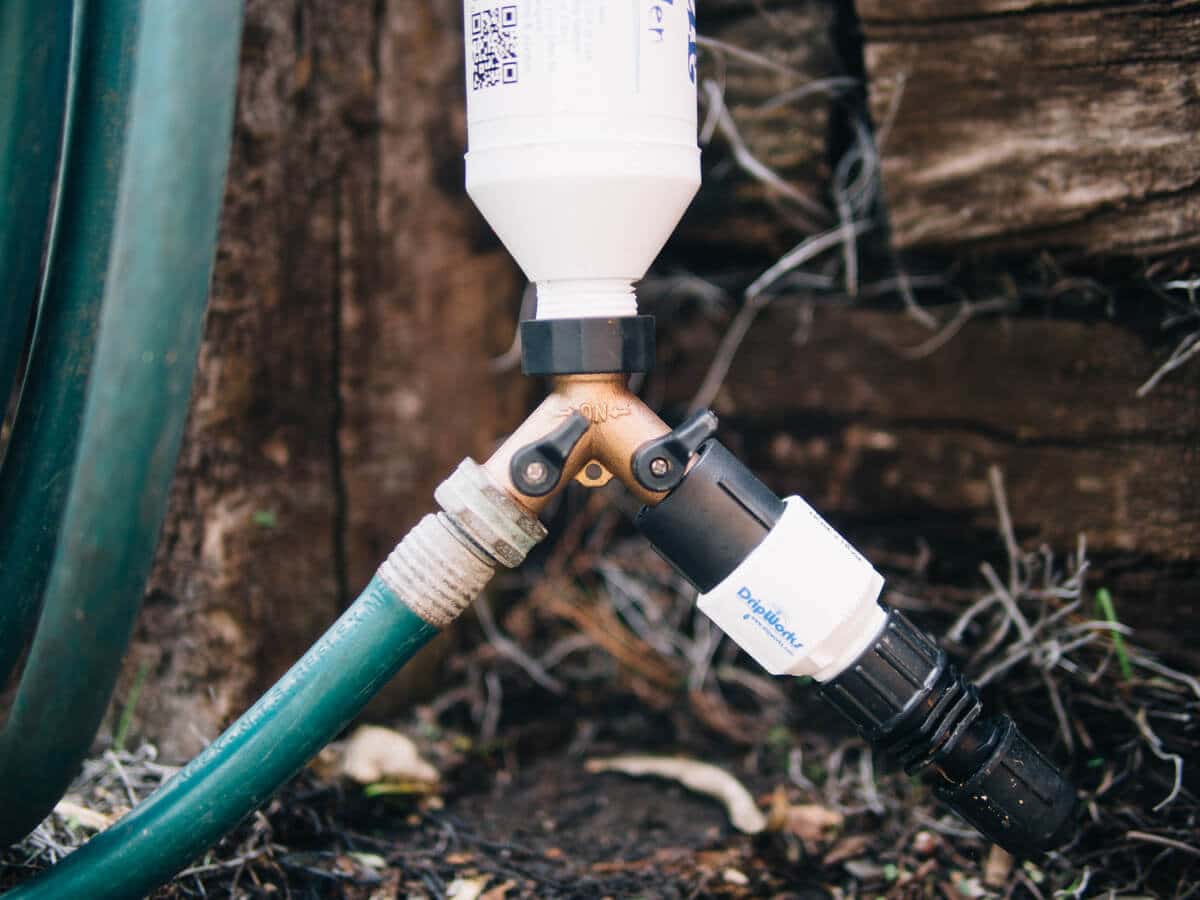
The brass hose Y enables me to split my faucet into two lines; one for the drip system and for my garden hose. It’s not part of the kit, but a useful addition if you only have one faucet in the garden.
Before you start the installation, you should have an idea of how and where you’ll be running all your lines. Gardens with multiple faucets can be split into multiple zones, which means you’d also need multiple timers and vacuum breakers. The zones are independent of one another and can even be installed from the same kit, as long as you have enough fittings.
Step 1: What are the three sections of a drip irrigation system?
A basic system comprises three sections: the components on the faucet (which I’ll call the faucet assembly), the mainline tubing and micro tubing (which carry water from the faucet assembly to the emitters), and the emitters (which in our case is the soaker dripline).
The faucet assembly is the heart of the drip system: It turns the irrigation on and off, controls the water pressure, filters debris from the water before it’s distributed, and prevents backflow contamination.
The faucet itself (also called a hose bib) stays open all the time, so it’s important to ensure that yours is in good working order with no leaks.
Step 2: Install the faucet assembly.
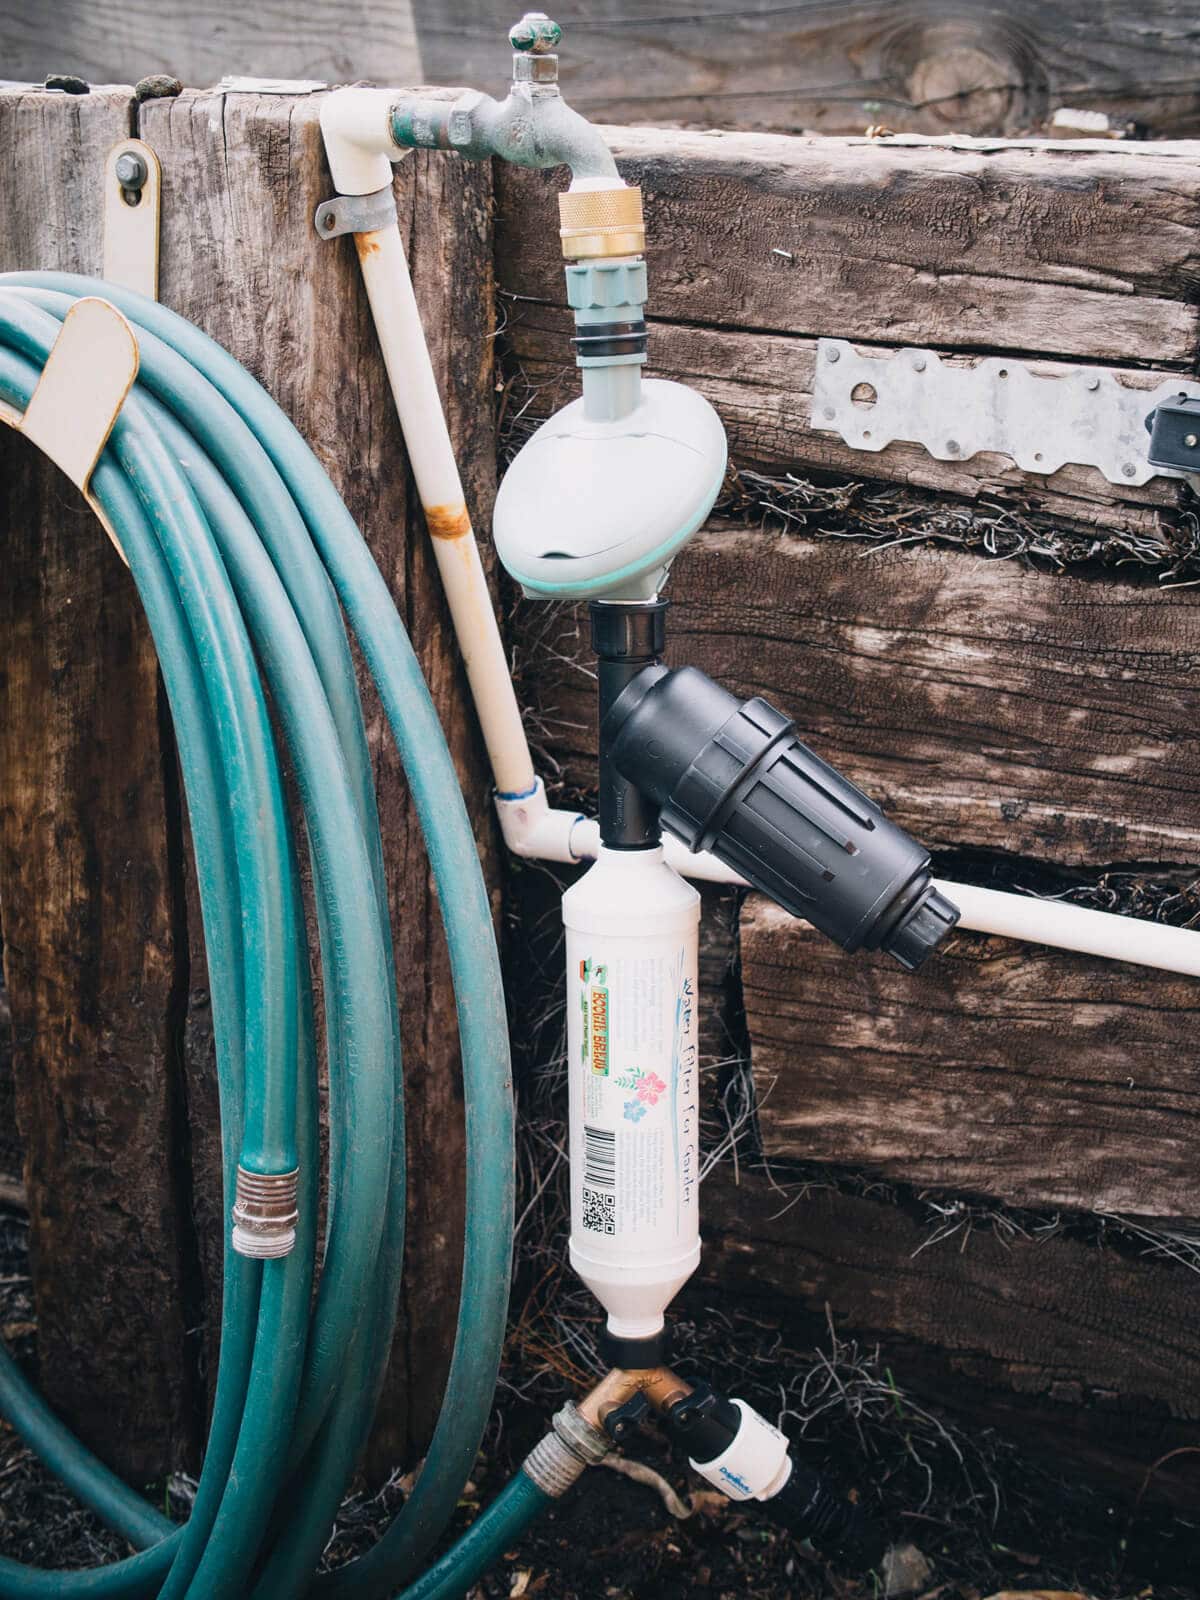
You’ll notice that I have an extra part in mine that’s not from DripWorks. It’s a Boogie Blue water filter, and in my previous post on compost tea, I mentioned that I have this filter attached to all the faucets in my garden. This is not the same filter (the black cylinder below) that comes with the irrigation kit.
If compost tea is a regular part of your garden routine, Boogie Blue dechlorinates your water so you don’t inadvertently destroy all the good bacteria you just inoculated your soil with.
I’ve also split my faucet into two lines, so the assembly here includes a brass hose Y valve.
Starting at the faucet, connect the following parts in this order: vacuum breaker, timer, home garden filter, Boogie Blue water filter (optional), hose Y.
At the hose Y, connect your garden hose to one valve and the pressure regulator to the other valve. Attach an Easy Loc female hose start to the regulator; this will eventually connect the faucet assembly to the mainline tubing.
Step 3: Lay out your mainline tubing.
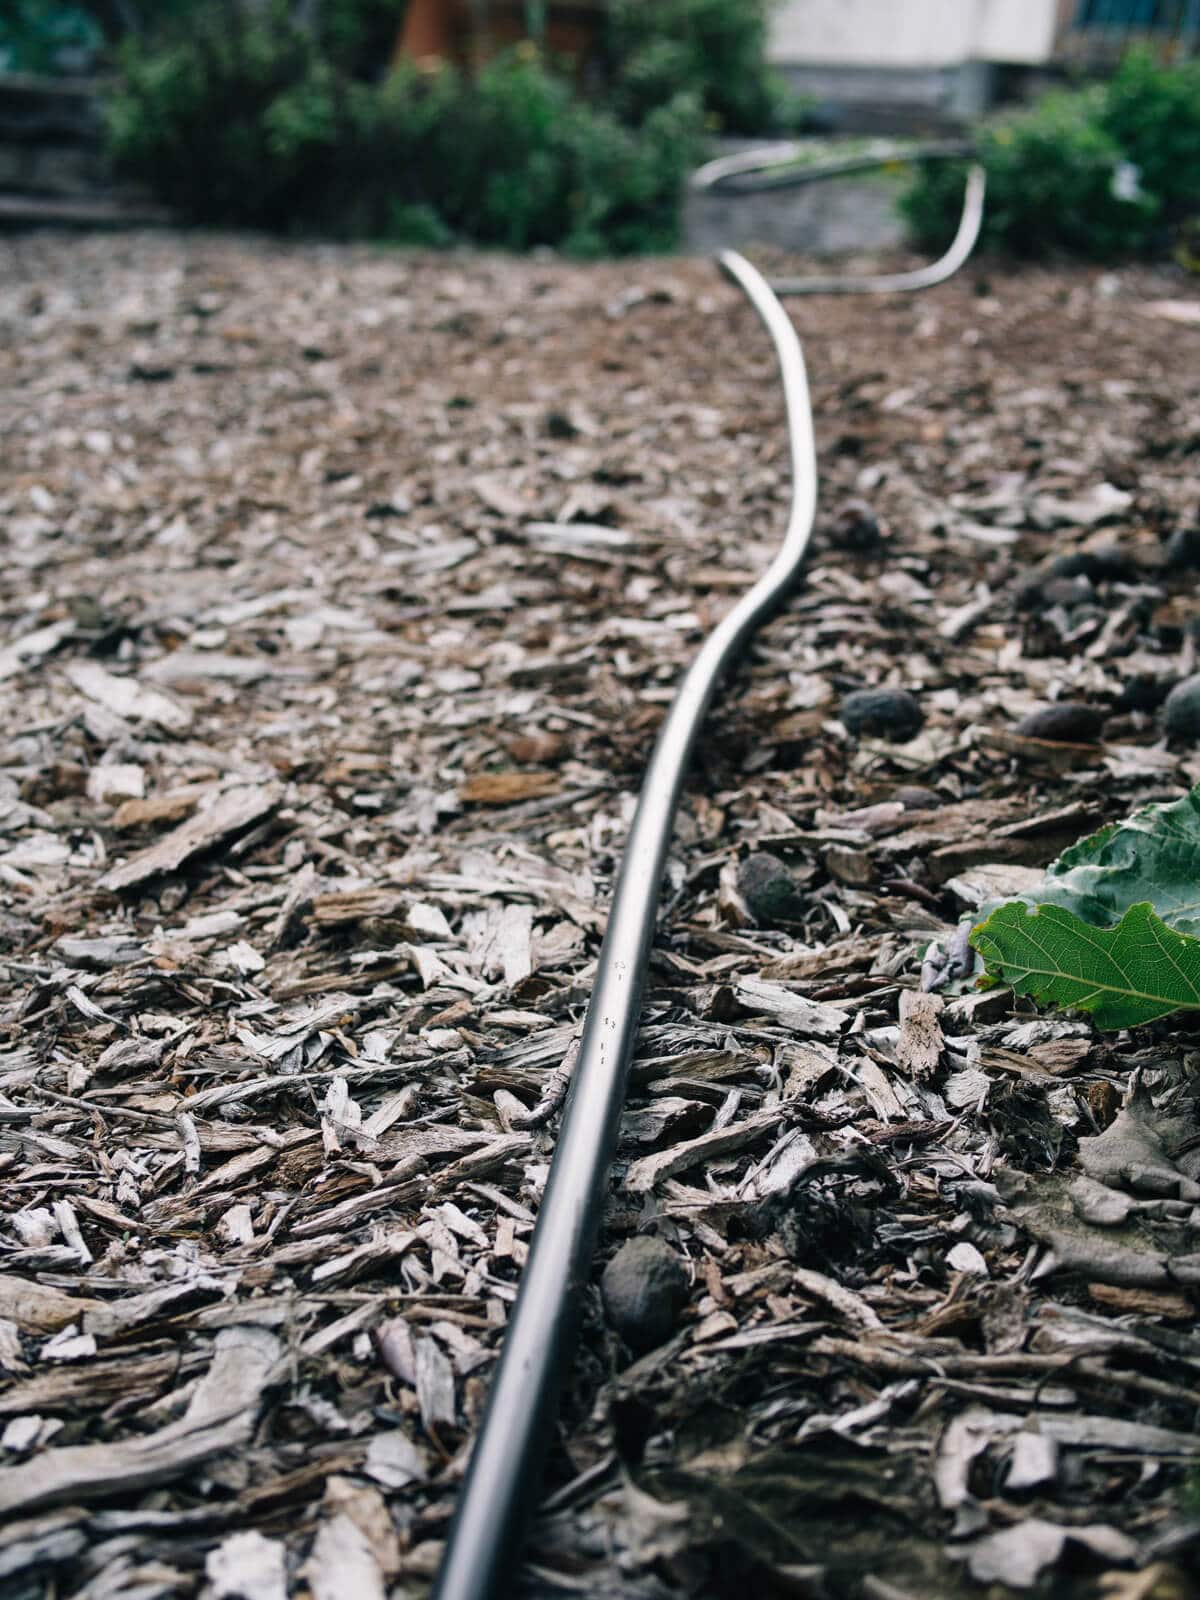
The mainline tubing is made of flexible polyethylene and comes shipped in a tight roll. I found it easier to work with once it’s been unrolled and left in the sun for a day to relax the tubing.
Stretch it out across your yard and untwist any kinks in the line as you roll it out. If possible, save the installation for a warm day when the plastic will be a bit more pliable.
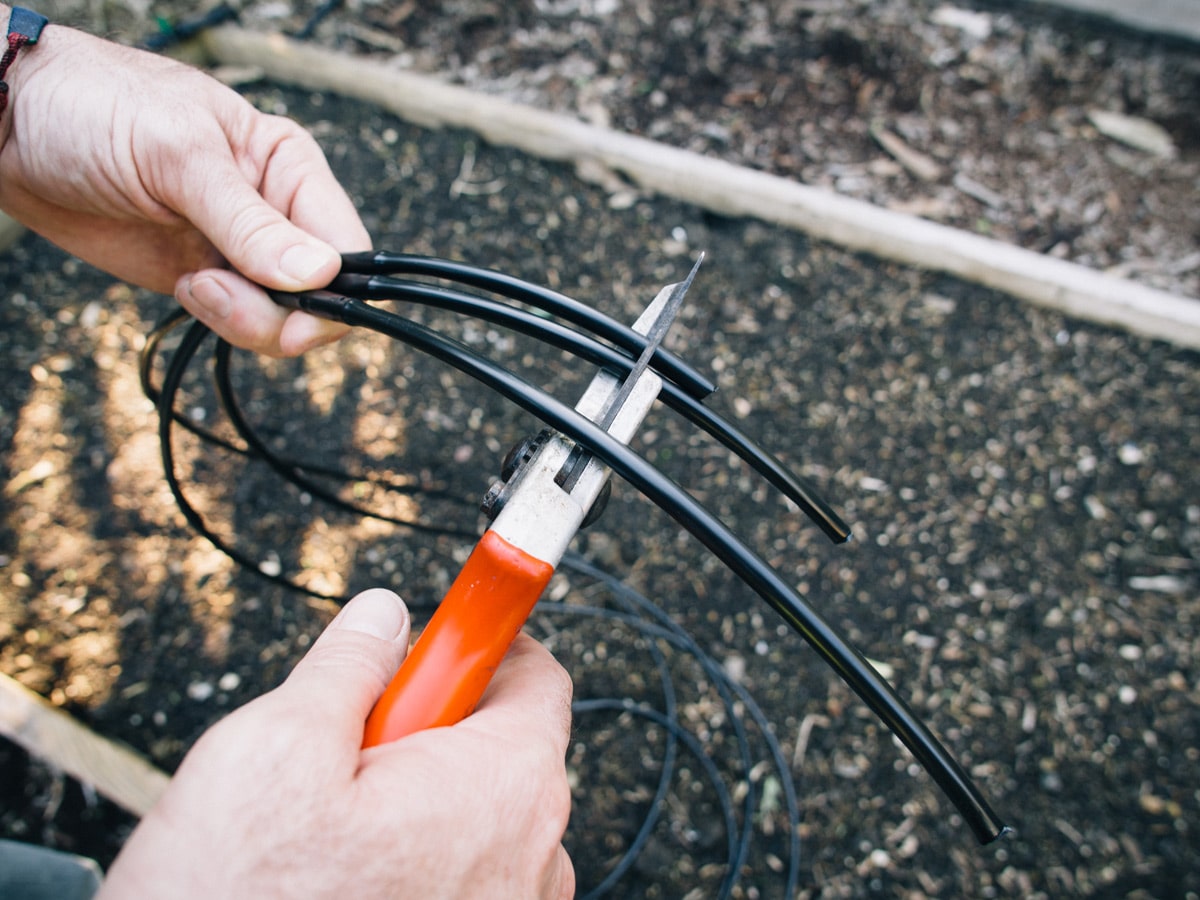
When you’re ready to start assembling, use a pair of sturdy scissors or garden pruners to cut the mainline tubing to length. The bulk of your time will be spent measuring, cutting, placing, and connecting the mainline tubing, as it’s the main artery of your system.
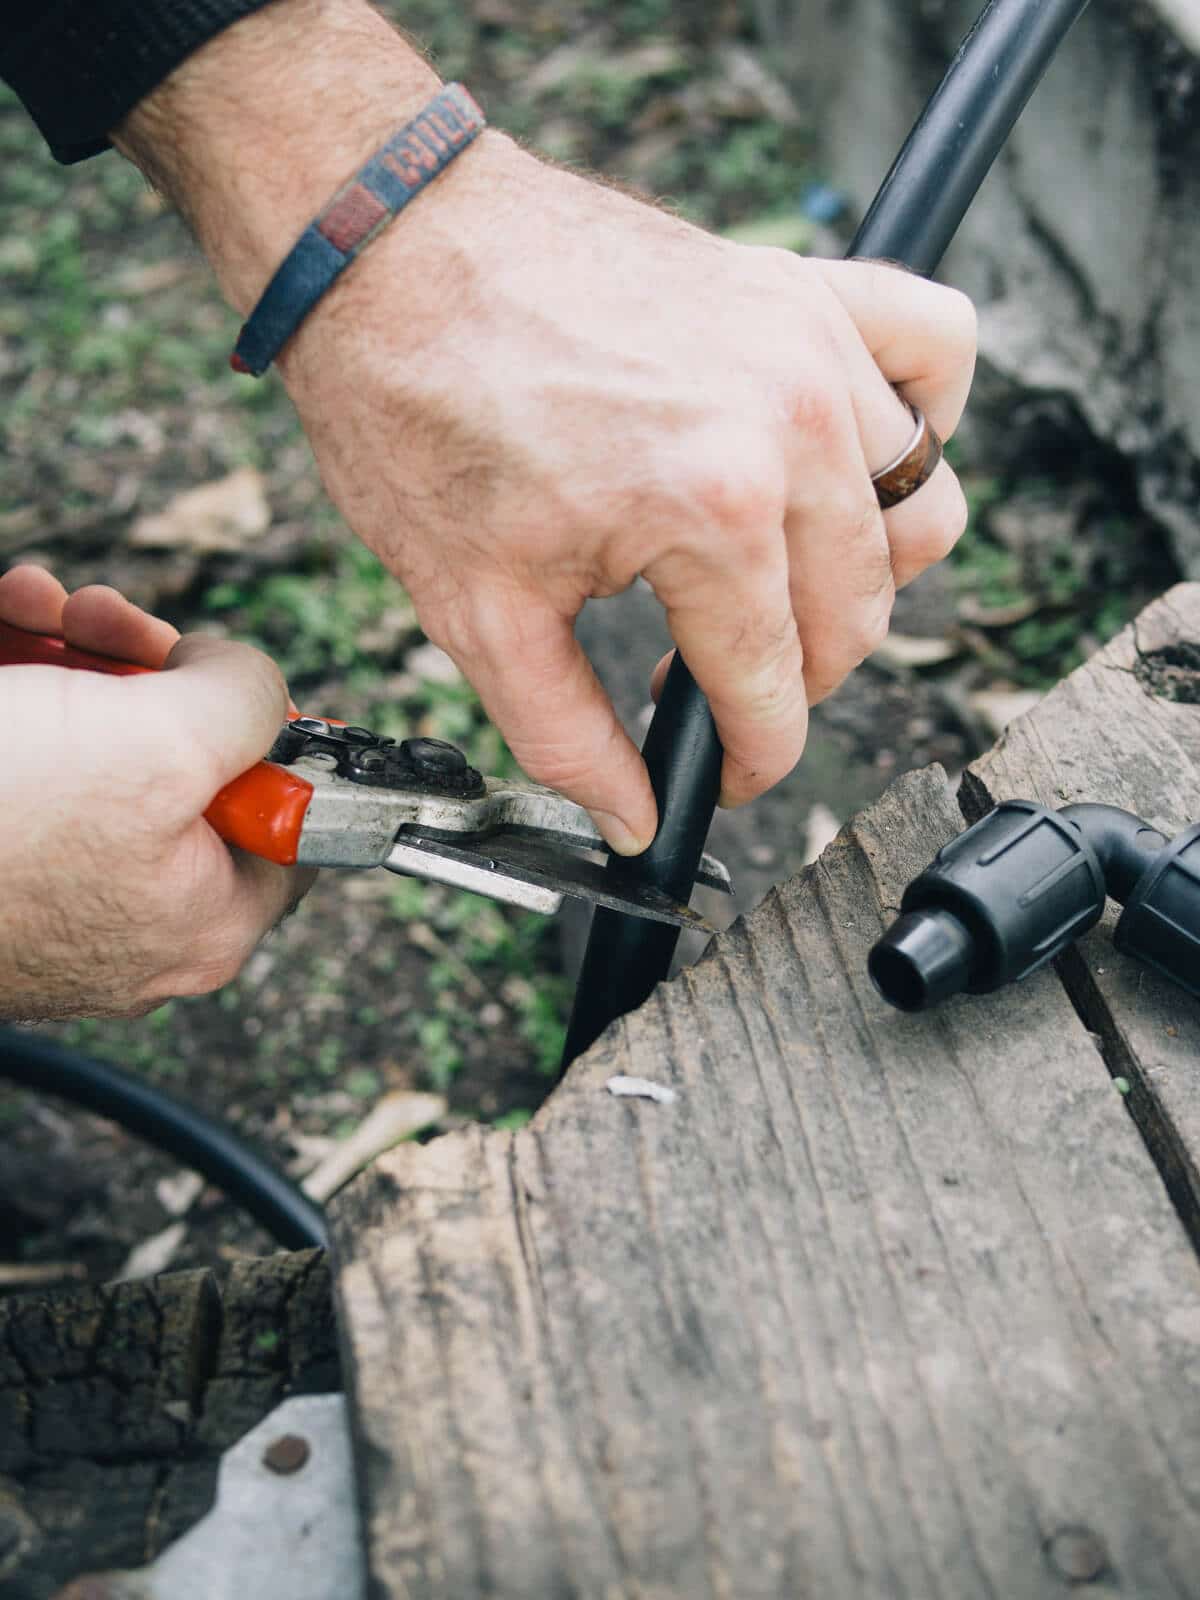
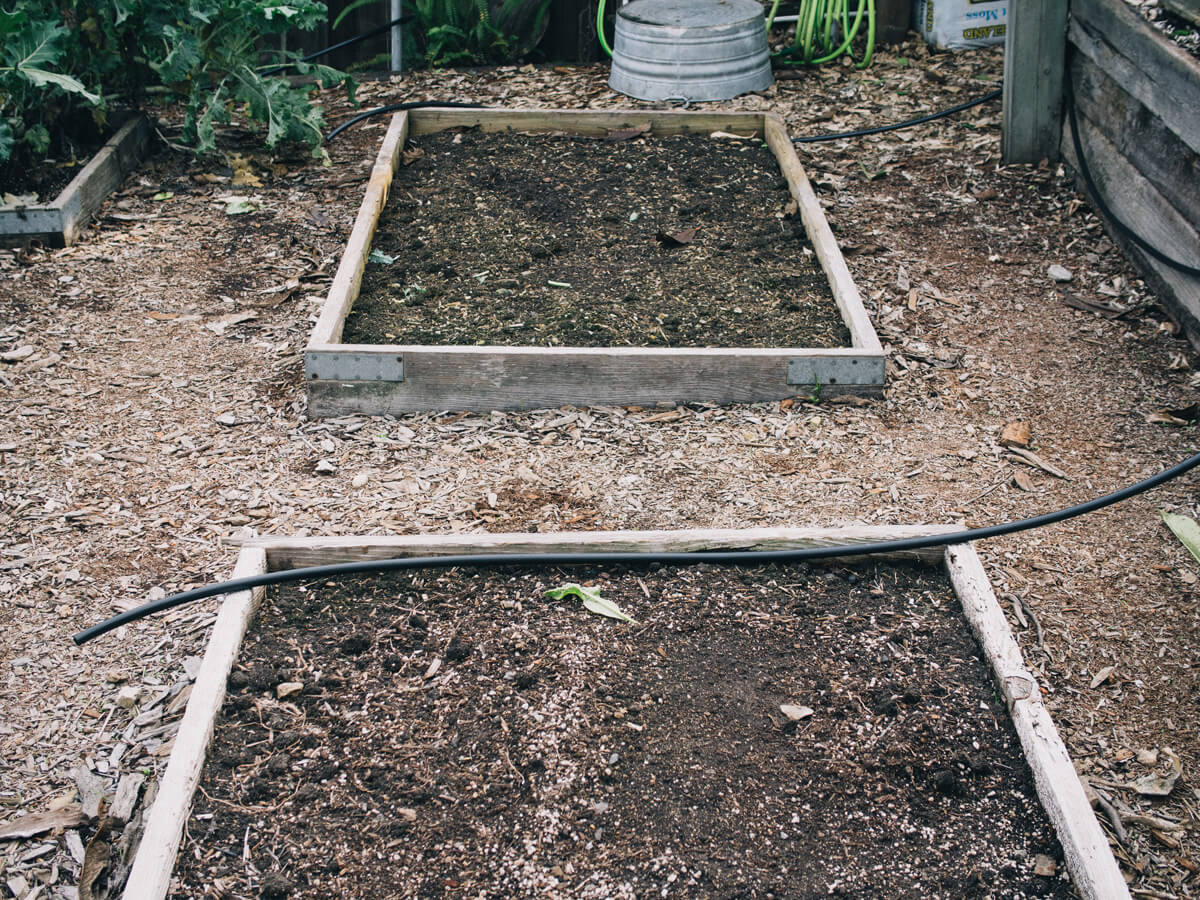
For our installation, we cut all the mainline tubing and laid them around the garden to gauge the general flow of the system. We left a little slack in the lines to give us some flexibility in case we decided to add or remove a “branch.”
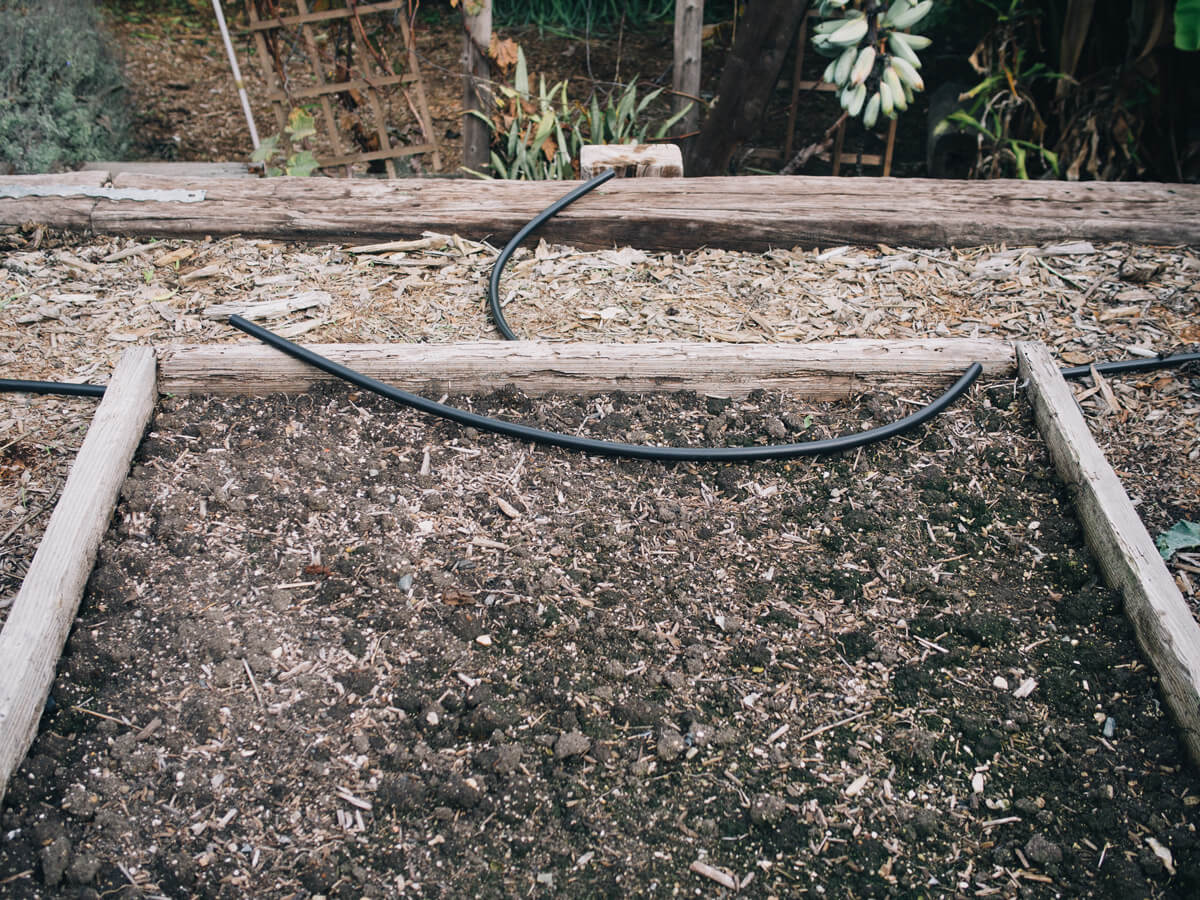
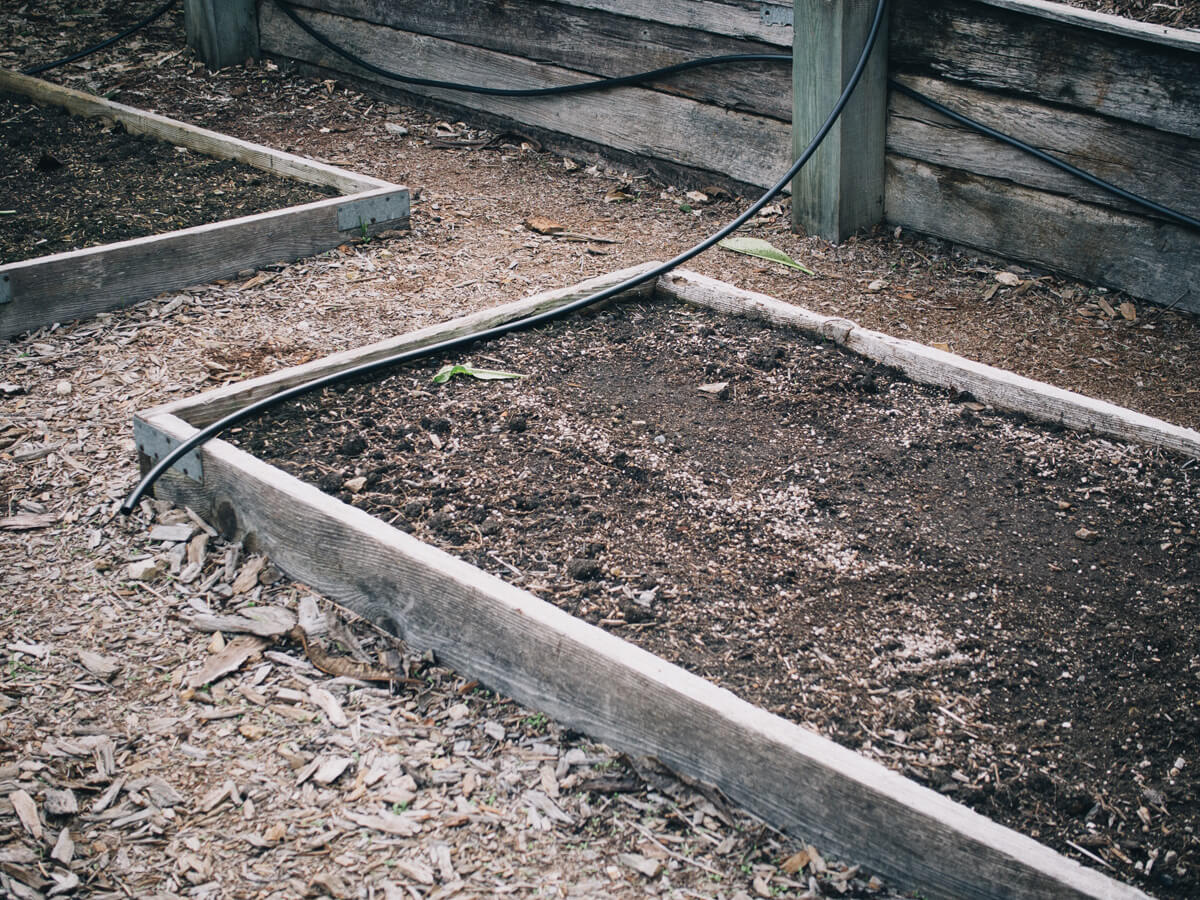
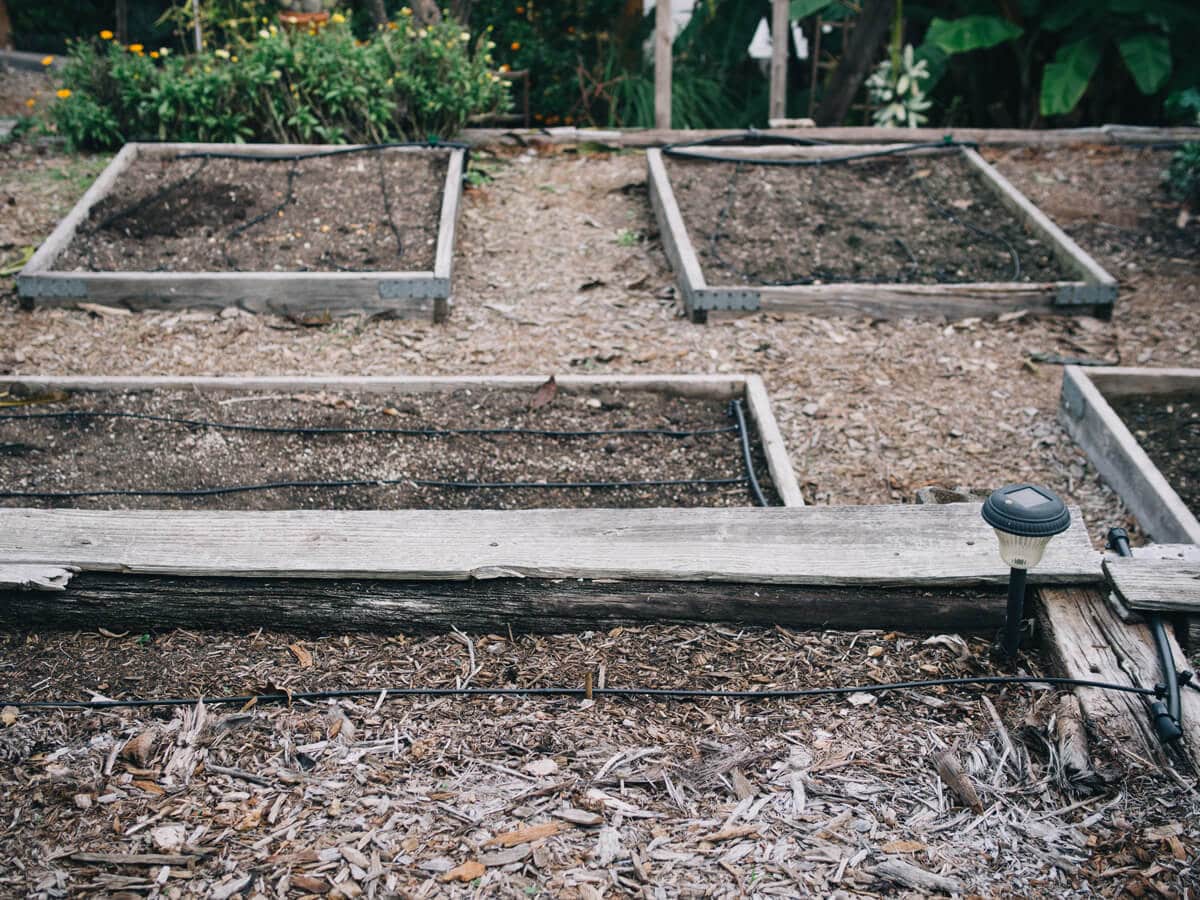
For each raised bed, we laid a piece of mainline tubing along the shorter side. This way, our soaker driplines will run along the length of the bed.
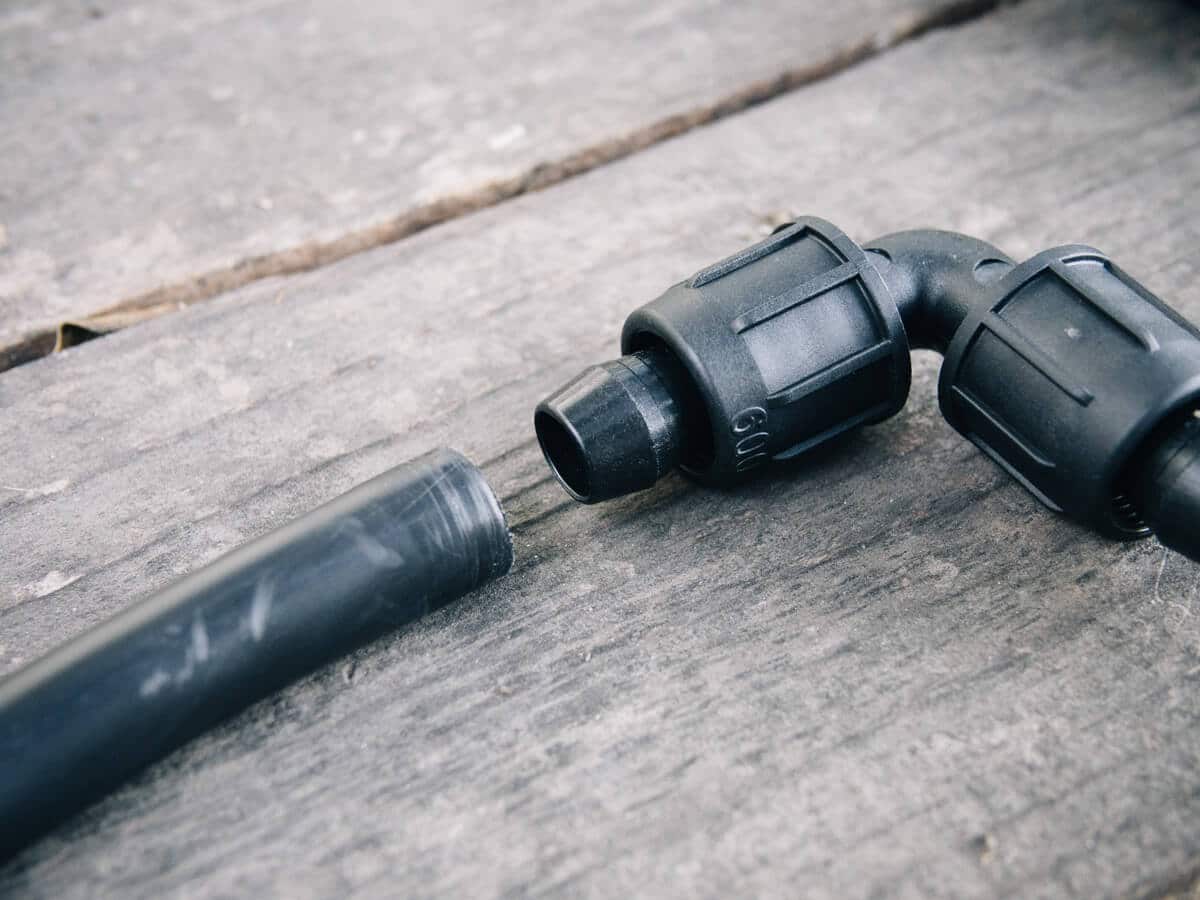
While the tubing is fairly flexible, you’ll need one of the Easy Loc fittings (such as an elbow or tee) if you have to add a branch or make a hard turn in the line.
Easy Loc fittings are compression fittings, meaning they’re squeezed into the mainline tubing (rather than screwed on) and then tightened in place with a few turns.
If the fitting resists being pushed in (as it often does on a cold day), we found it helpful to very lightly and very quickly heat the tubing with a lighter, which expands the plastic just a touch. Take caution not to melt it though!
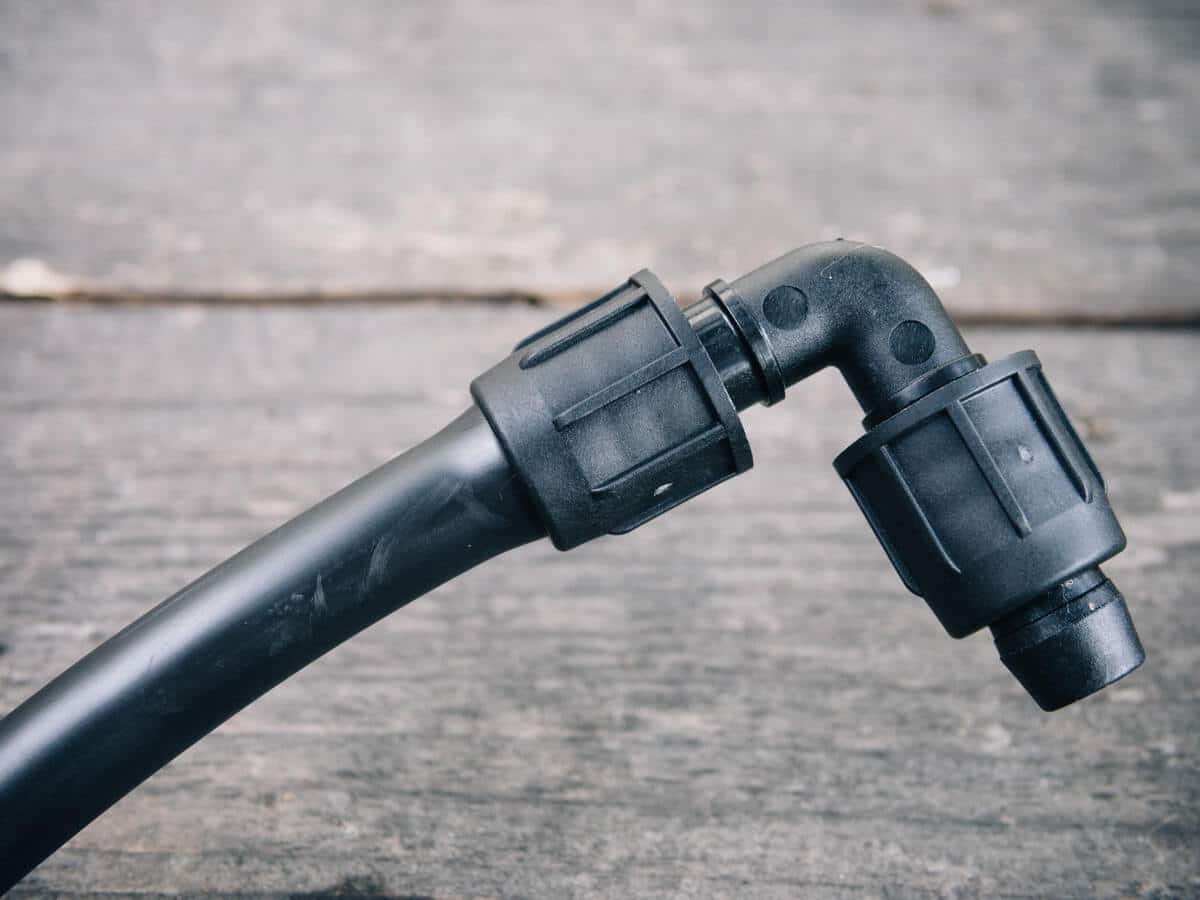
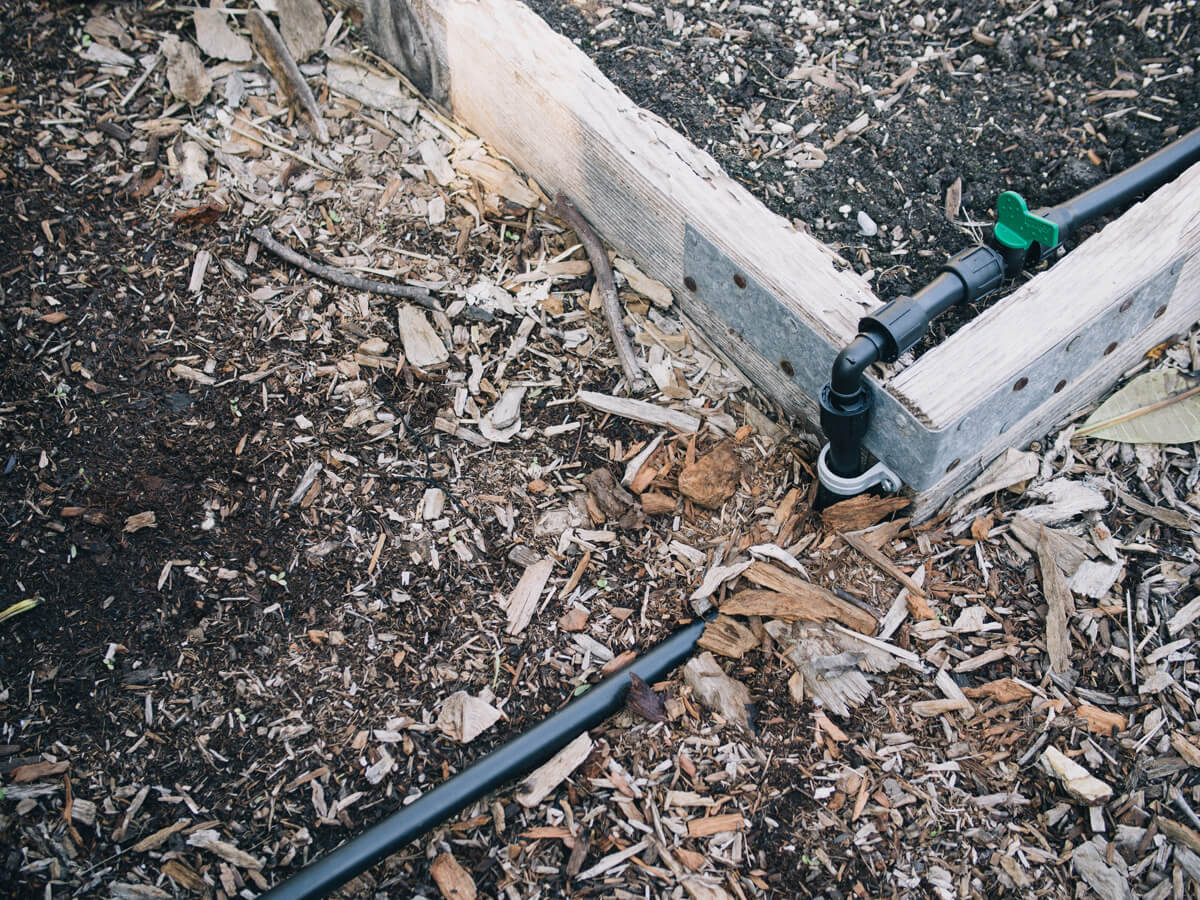
Here’s a look at the mainline tubing fully assembled in a raised bed. We secured the tubing to our bed with a metal bracket (that we already had) and eventually, the tubing outside the bed will be covered with mulch to protect it from the elements. We also equipped each bed with an Easy Loc fitting with a shut-off valve.
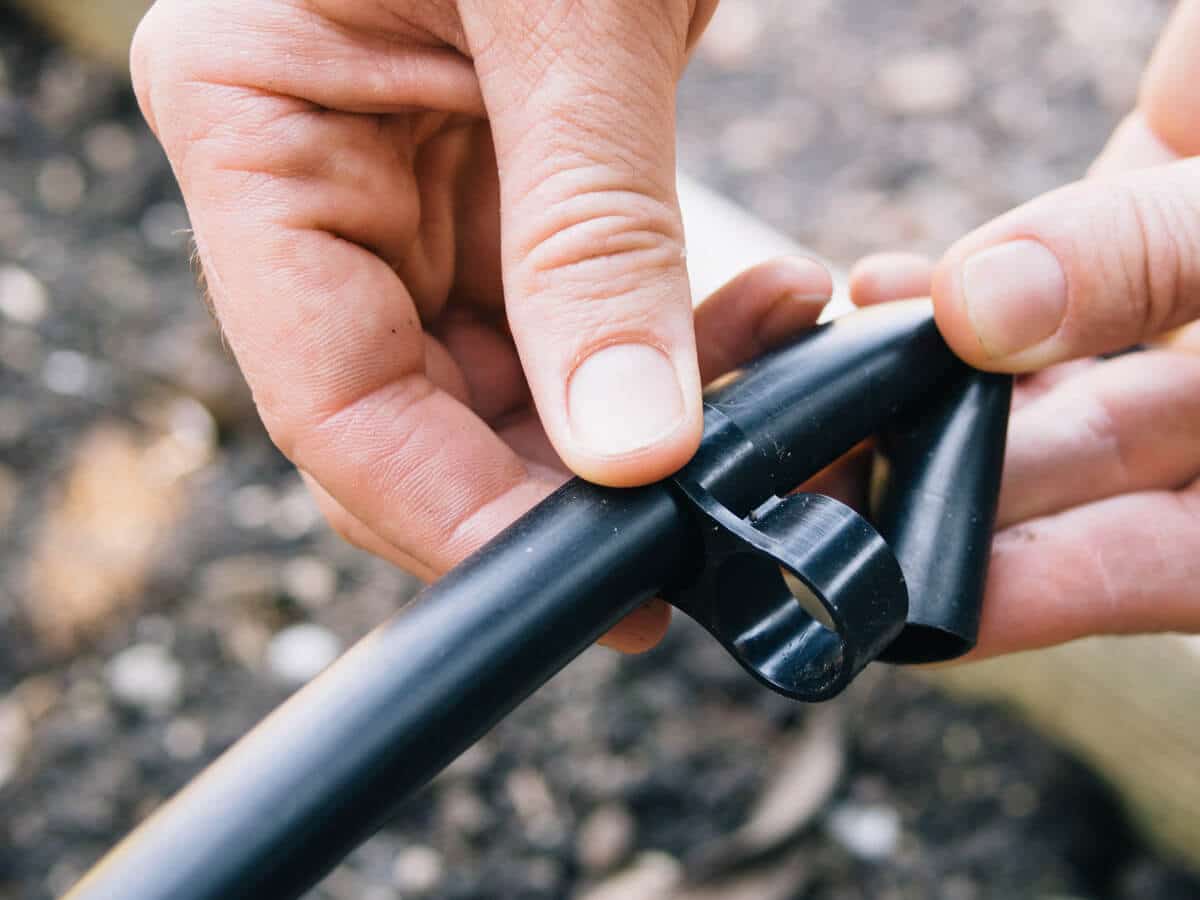
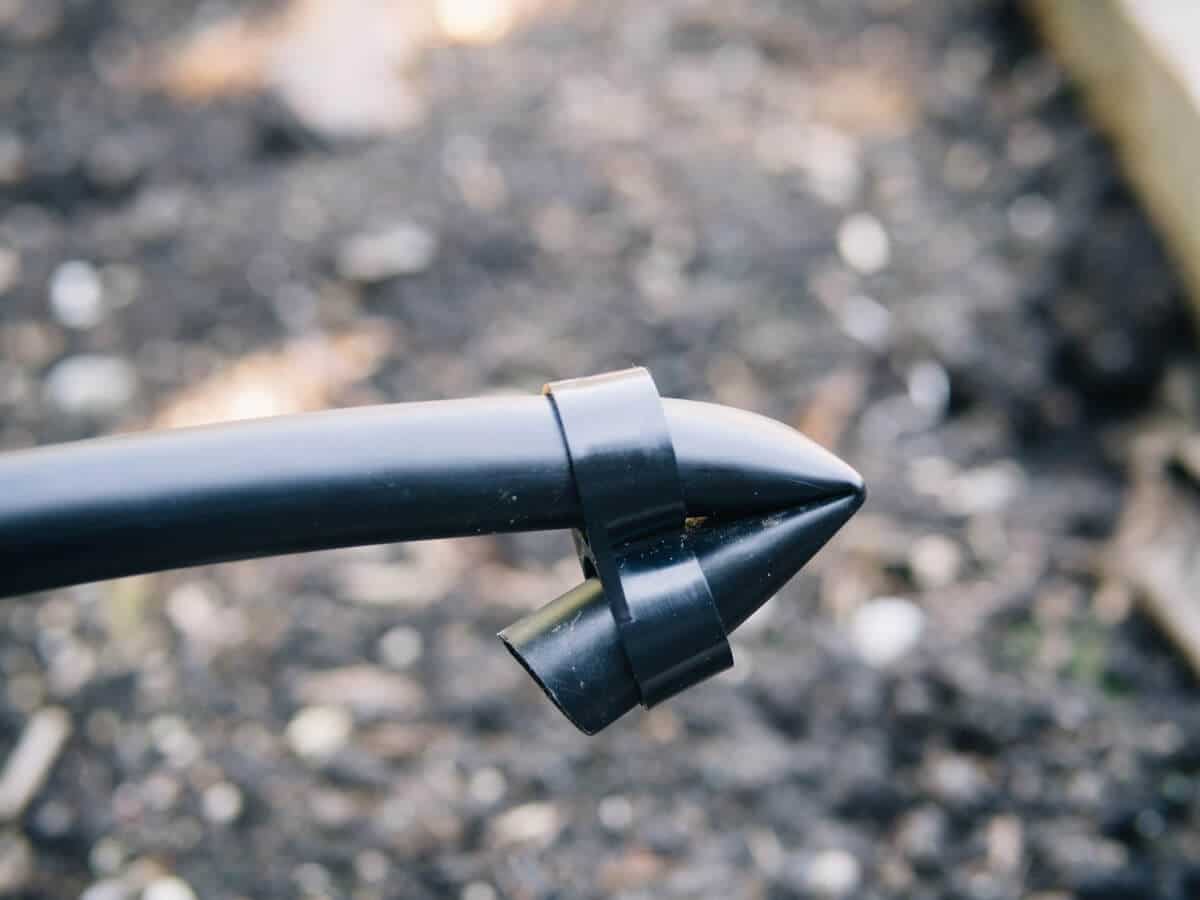
Once the mainline tubing is in place, connect it to the faucet assembly and turn on the water to flush out any particles that may have worked their way into the fittings. Then, kink the end and cap it off with a figure 8, which effectively seals it. Turn on the water again and check for any leaks.
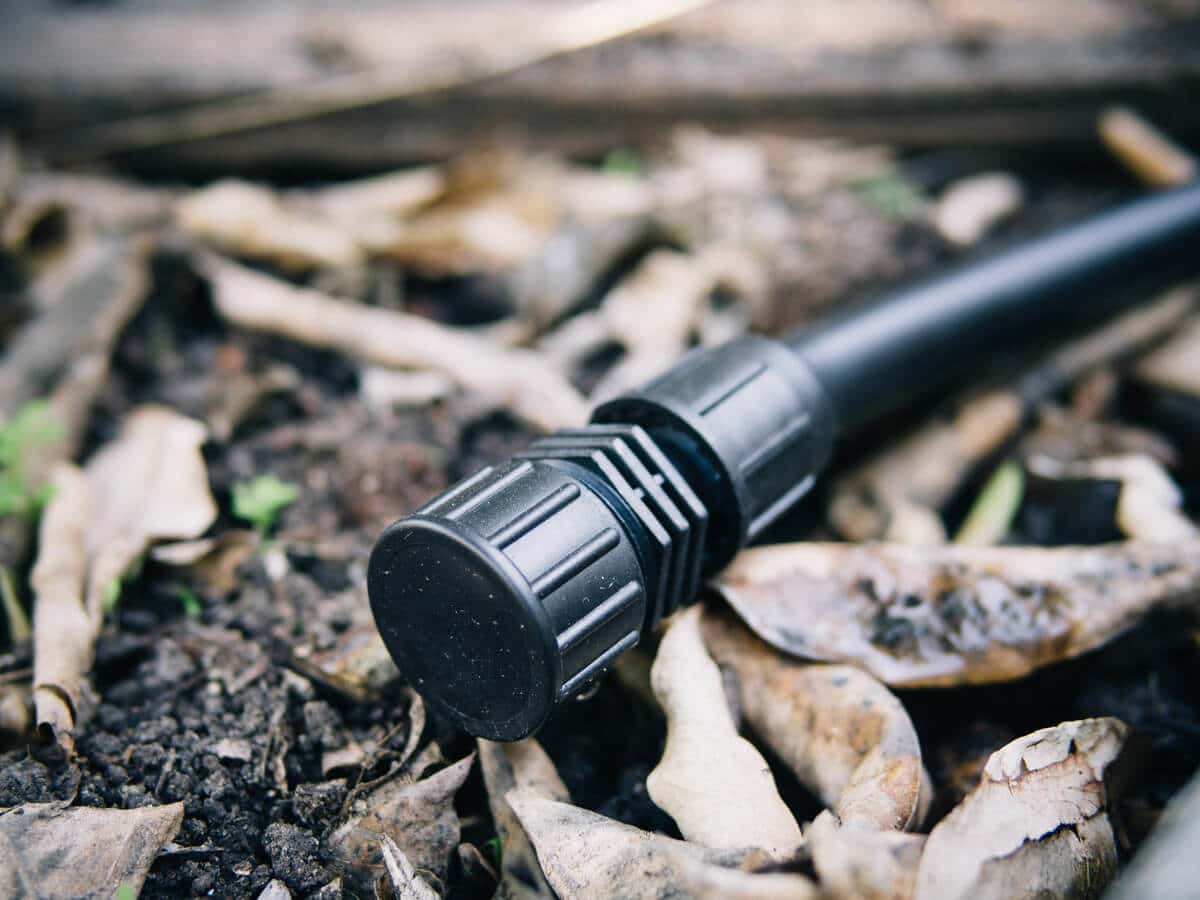
On any mainline tubing that you might expand in the future (by adding more emitters or driplines), you can seal it off with an Easy Loc end cap instead. When you want to branch off or extend the mainline tubing, you can easily remove the end cap and attach the necessary elbow, tee, or coupler.
Step 4: Lay out your micro tubing and/or soaker dripline.
Like the mainline tubing, these components should be unrolled and stretched out to relax the lines before you use them.
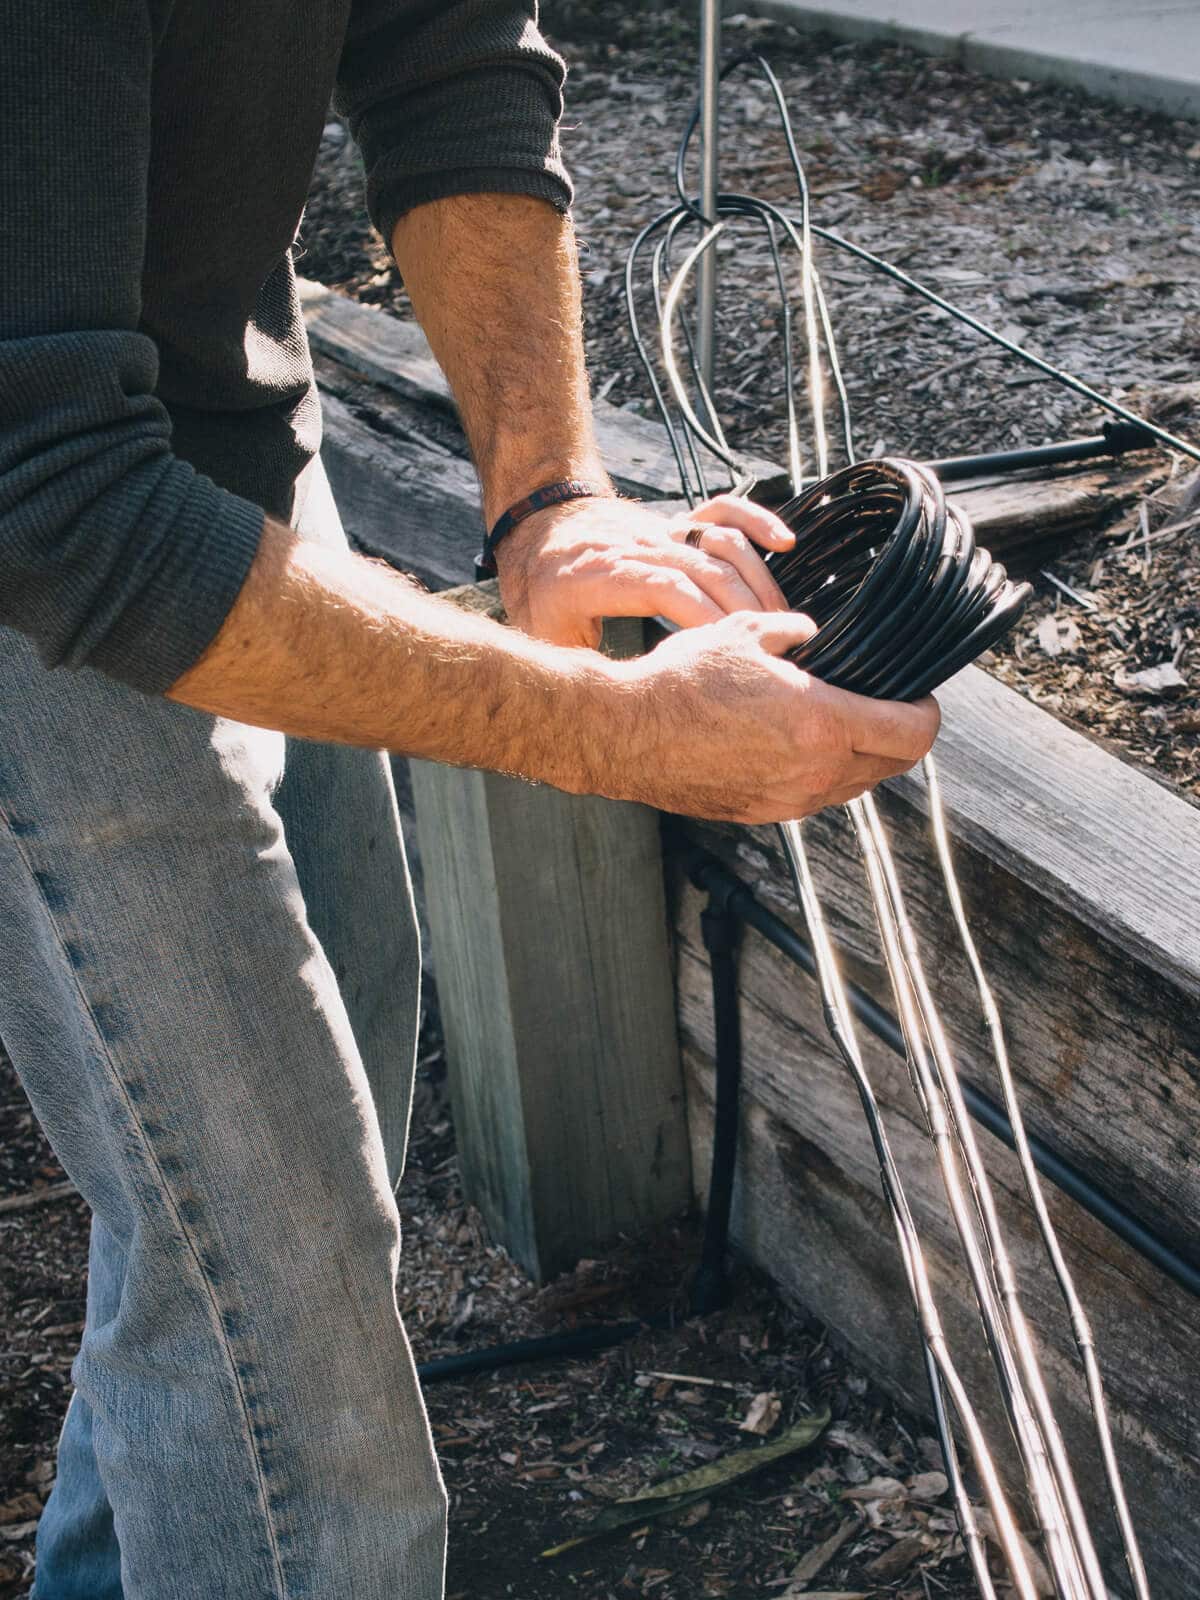
You may or may not need the micro tubing, depending on your garden setup. It serves the same purpose as the mainline tubing, but its thinner size makes it more flexible and maneuverable so you can weave it between trees and shrubs, for instance, or around containers and bird baths. This lets you place emitters exactly where you need them without watering the spaces in between.
The micro tubing is the same size as the driplines, so you can use all the small fittings (transfer barbs, barbed elbows, and goof plugs) interchangeably.
Decide how far apart you want your driplines spaced. For us it was every 10 to 12 inches, so we punched a hole in the mainline tubing where we’d connect a dripline.
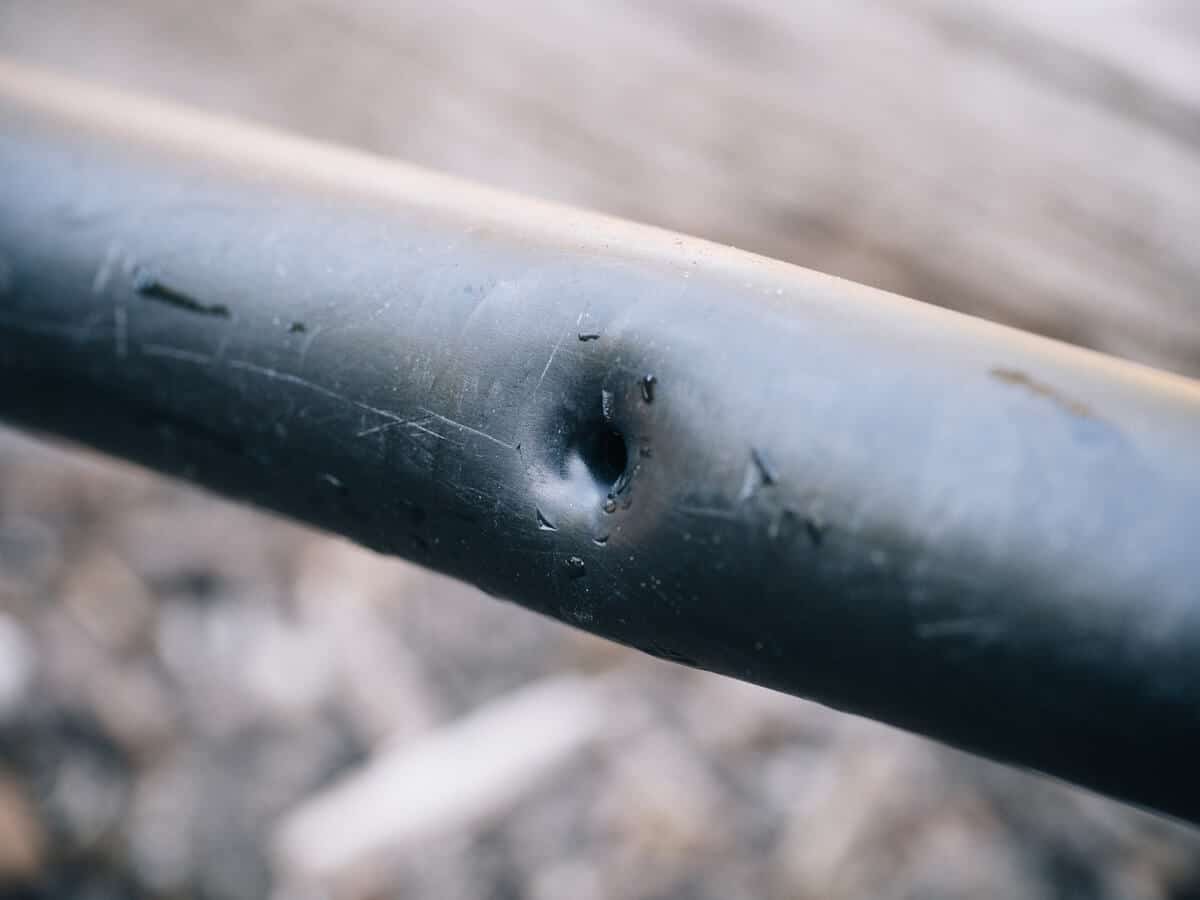
Then we cut the driplines to length. Since the emitters on the driplines are 12 inches apart, we staggered the lines so that we’d have emitters every 6 inches.
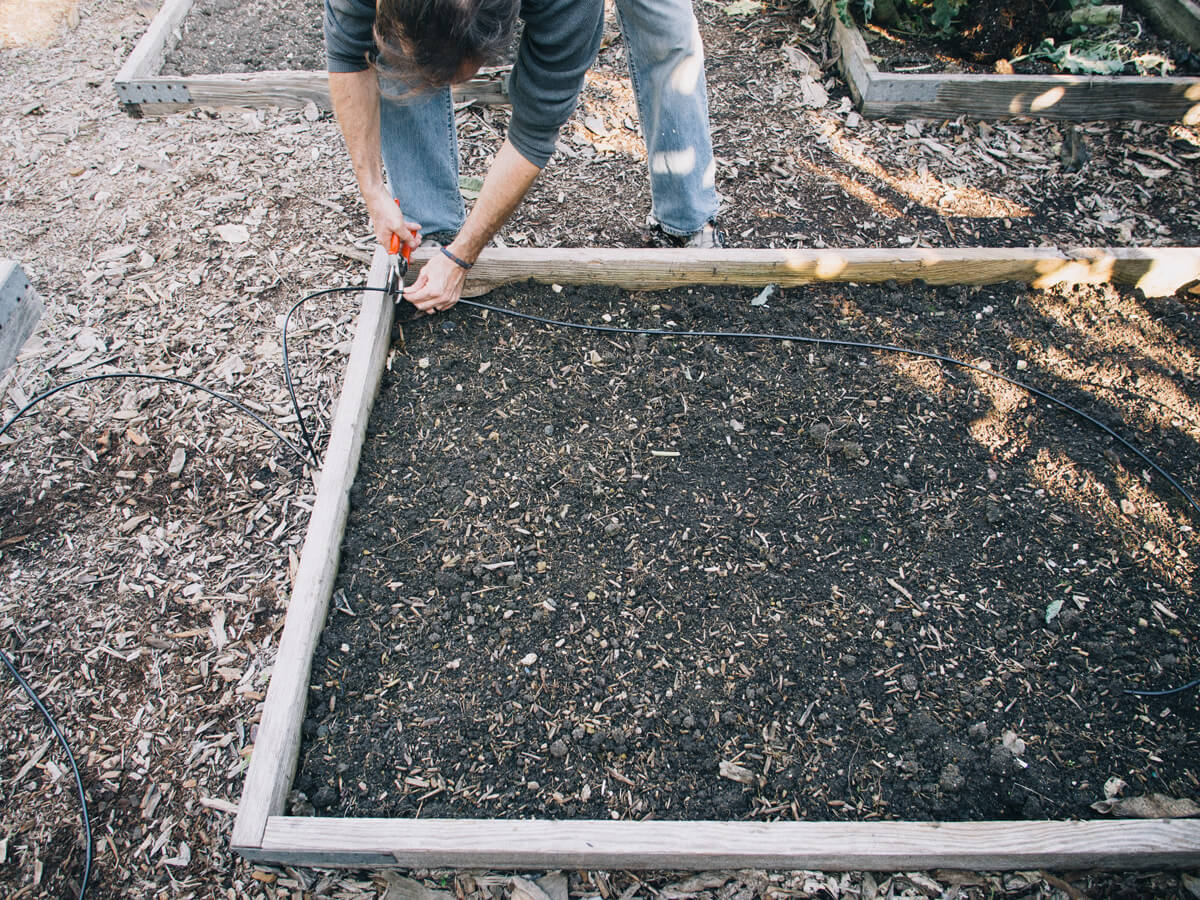
Step 5: Attach the soaker dripline to the mainline tubing.
Insert a goof plug to one end of the dripline to seal it, then insert a transfer barb to the other end and connect it to the mainline tubing. (Oops, did you punch a hole in the wrong place? No worries, the goof plugs are made for that! They’re also handy for plugging holes that you no longer need if you remove emitters.)
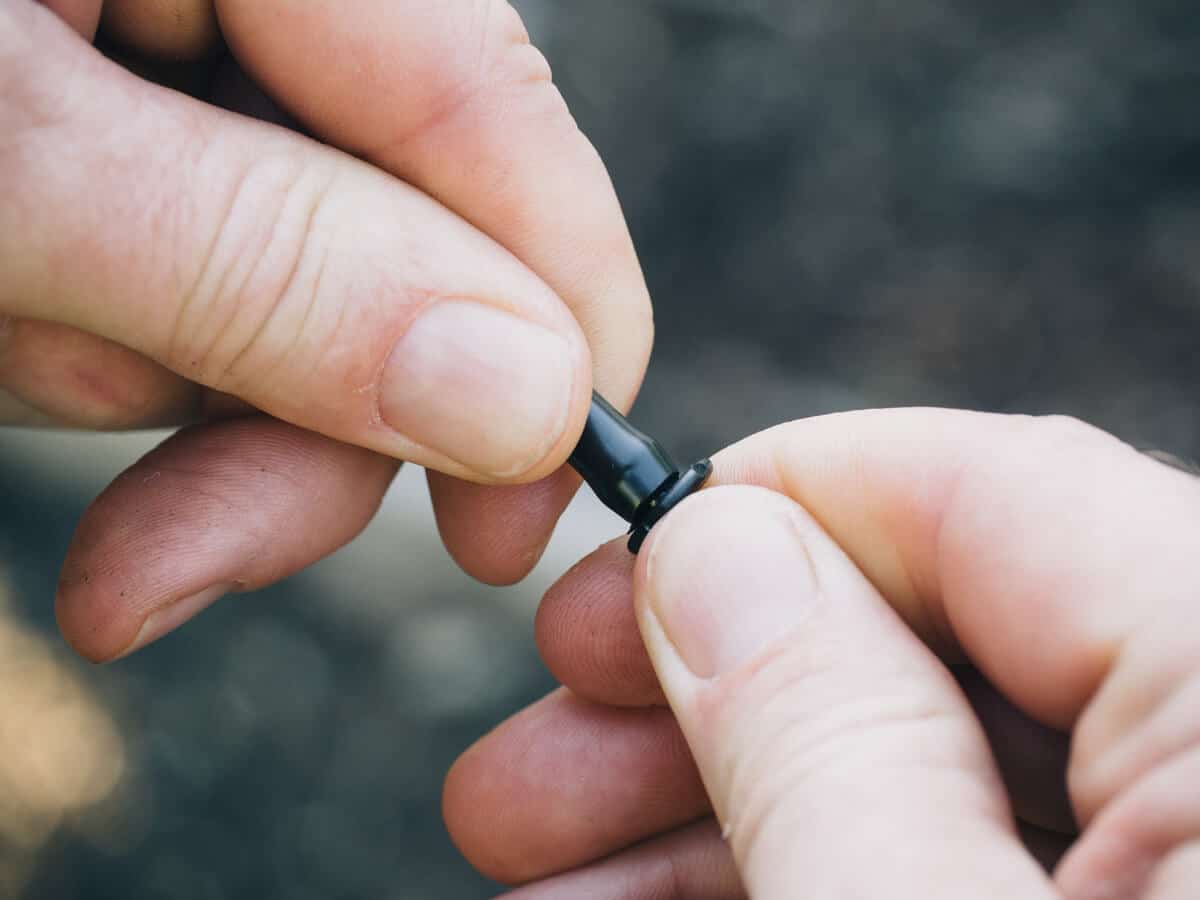
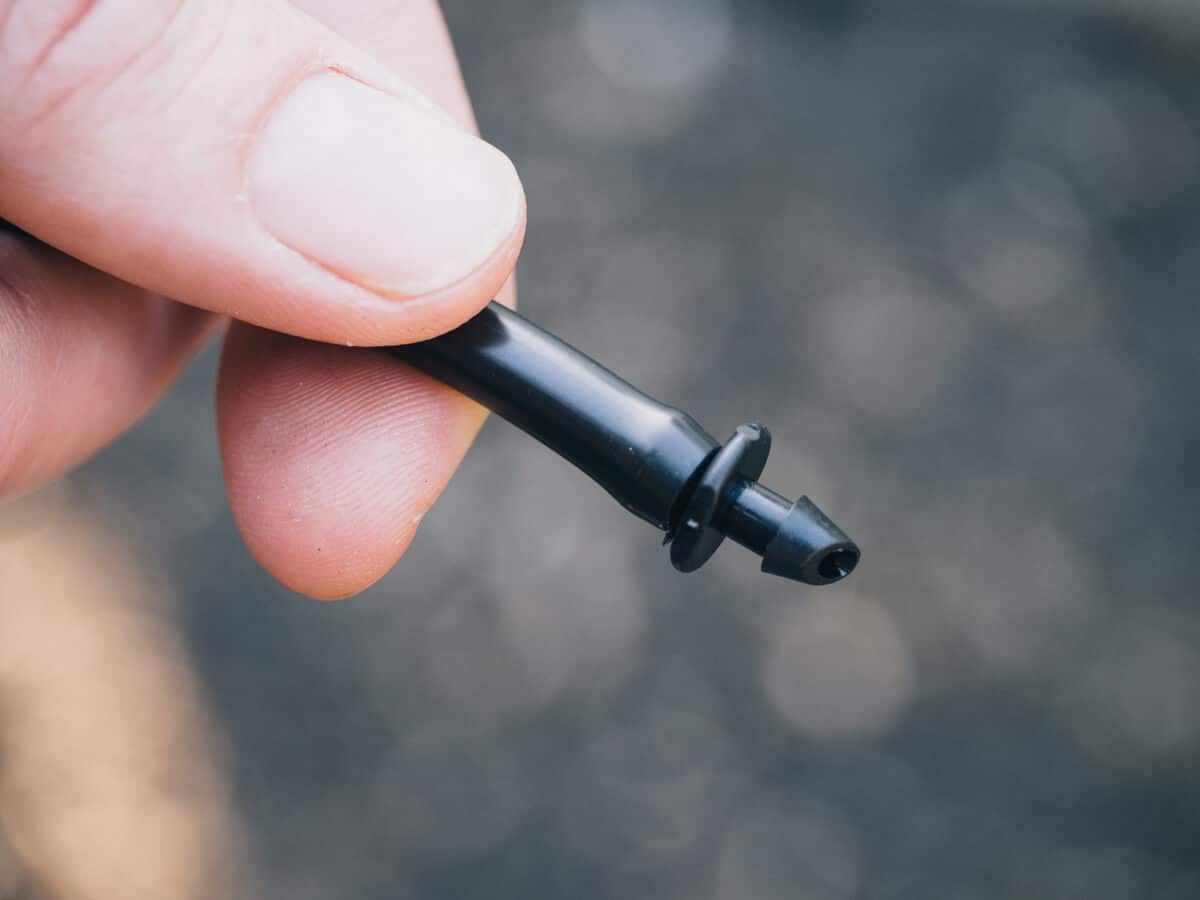
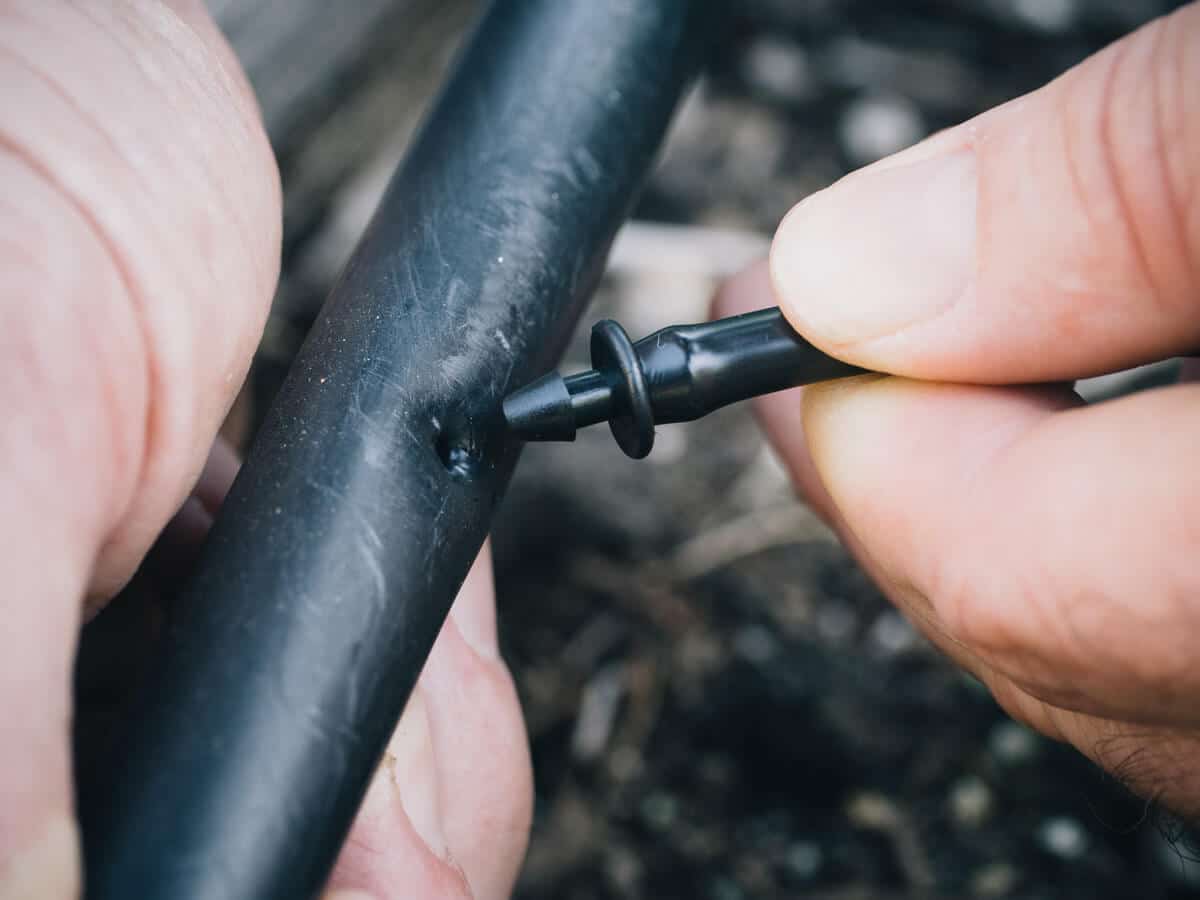
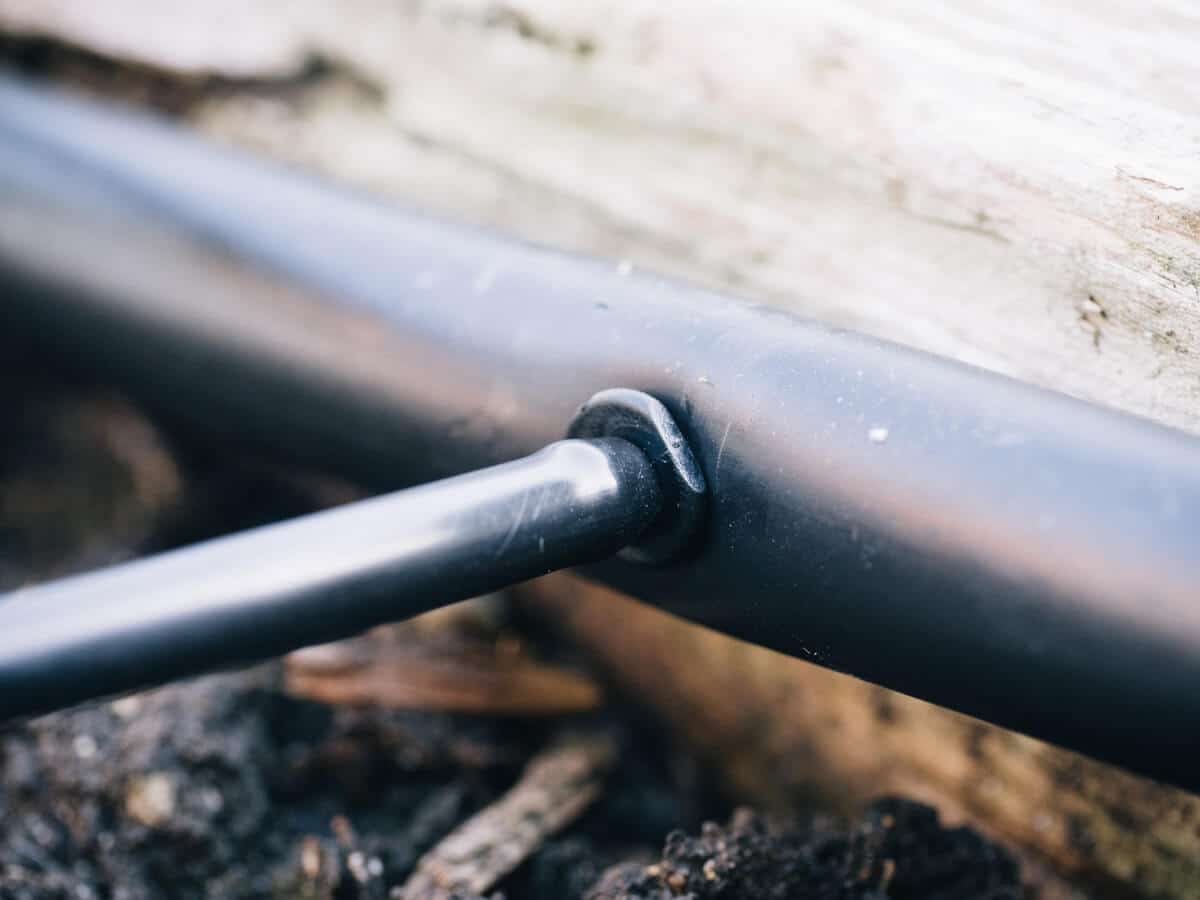
As above, use a lighter to very lightly and very quickly heat the hole in the mainline tubing if it feels too tight to fit the transfer barb.
Once the driplines are connected, turn on the water to ensure all the emitters are working properly.
Use a few hold-downs to secure the mainline tubing and driplines as needed. I usually leave my lines a little loose until I’ve planted my beds, as I tend to move them around to accommodate different plants.
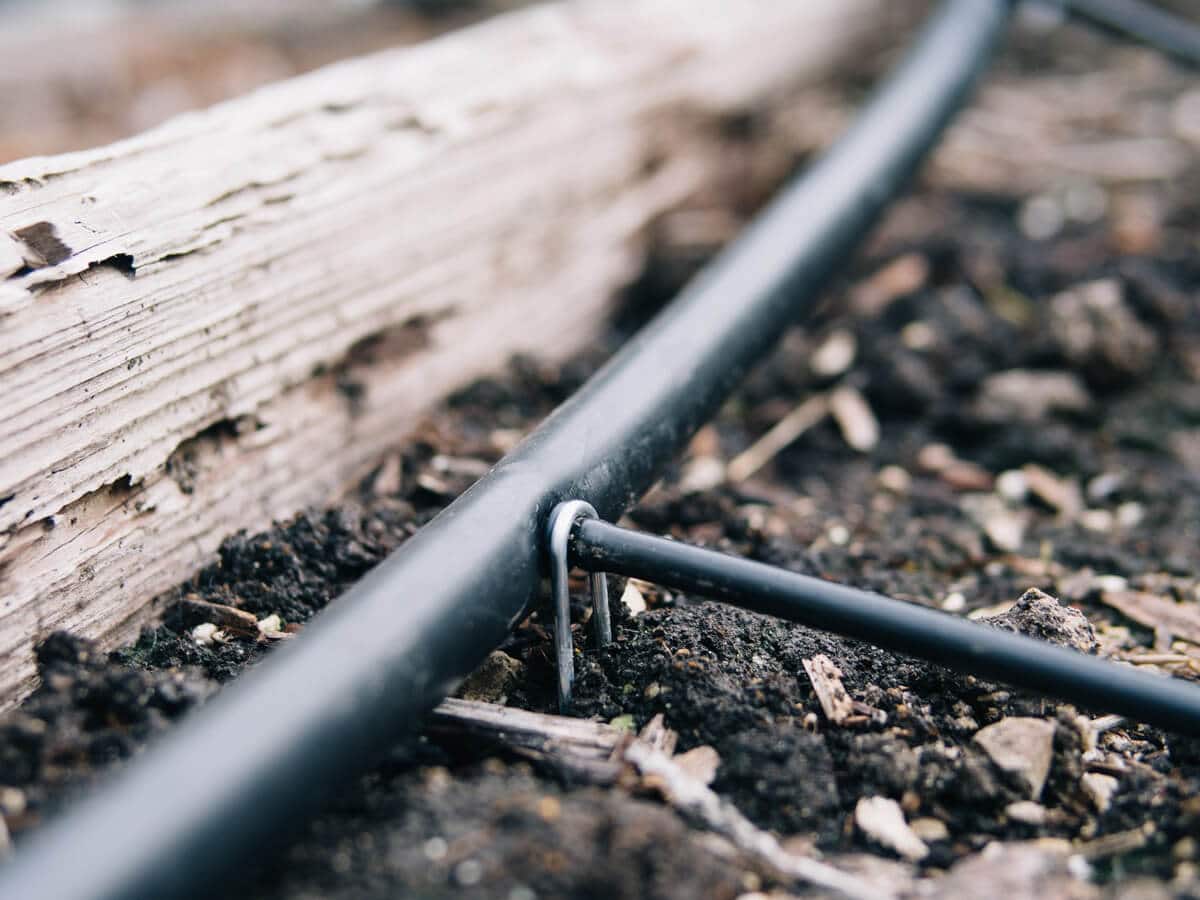
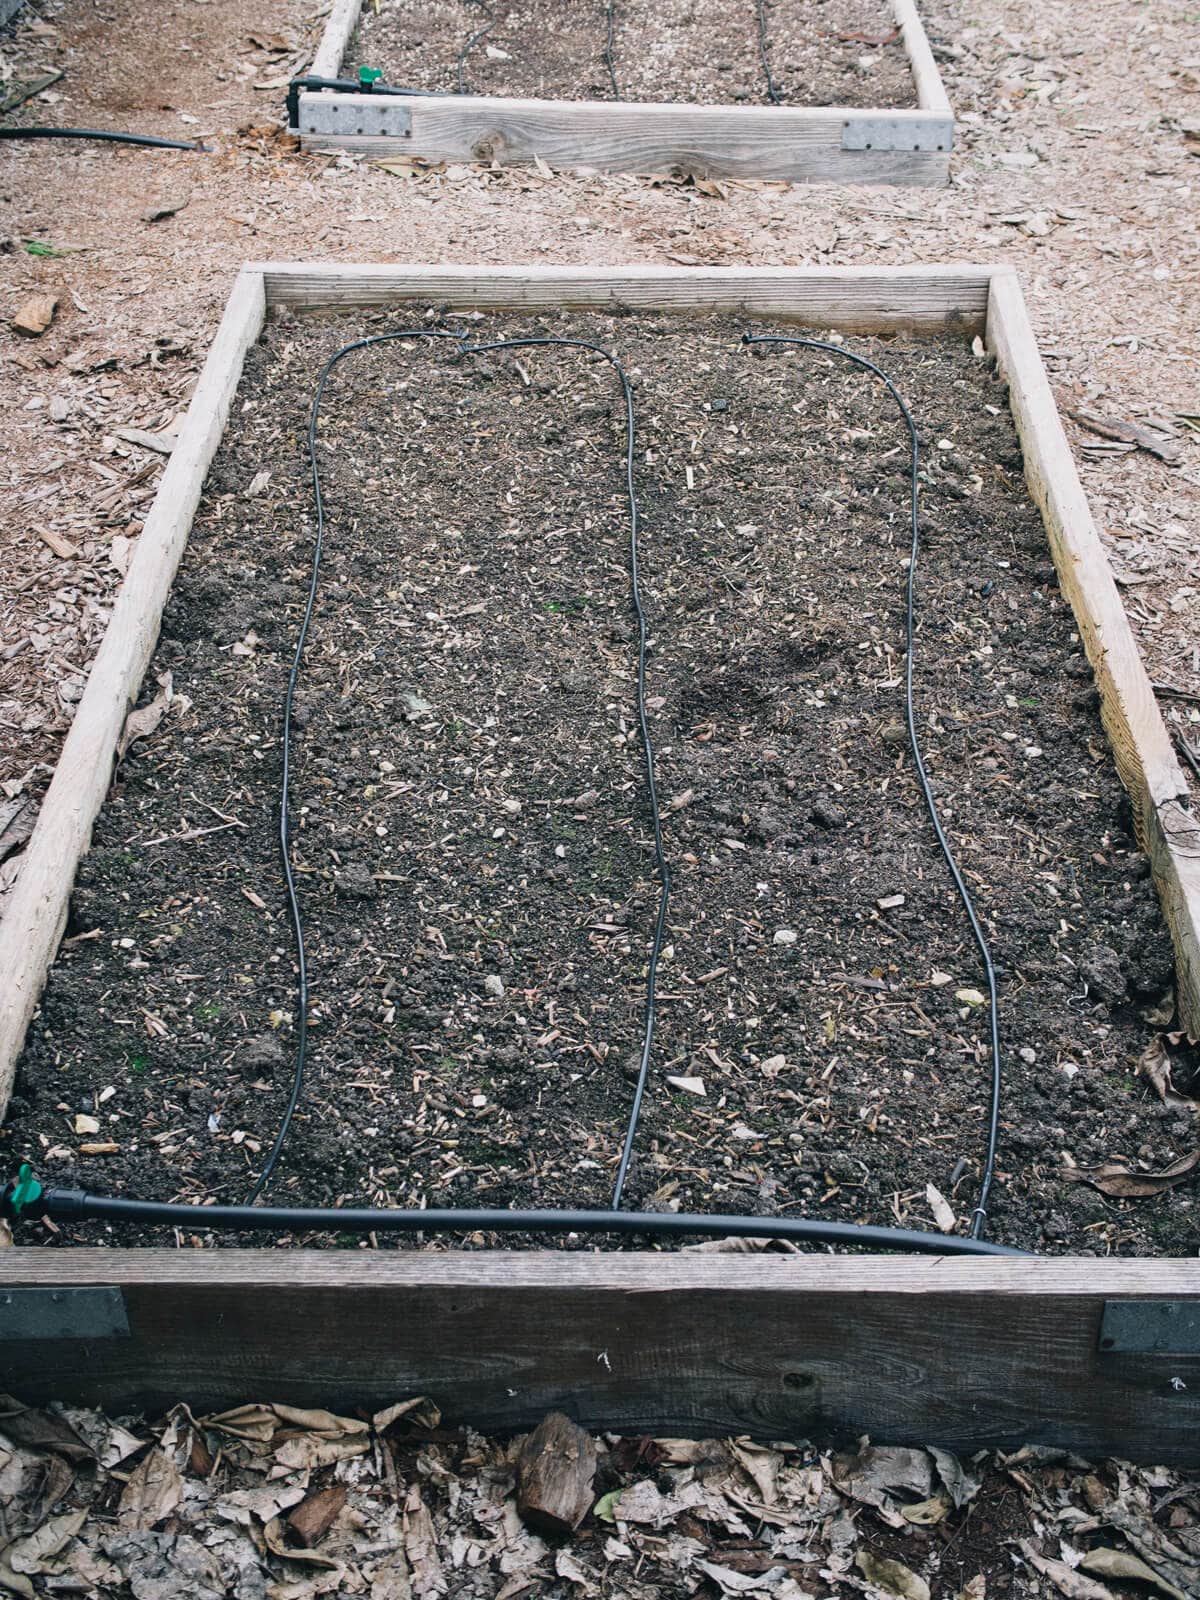
If you’re sowing seeds into your beds, keep in mind that you’ll still need to water the beds by hand for the first couple of weeks until the seedlings are established.
Step 6: Set up your timer.
It’s hard to say how often and how long you should set your timer for, as it depends on your soil and climate, the amount of water your plants need, and the amount of sun your garden gets.
In sandy soil, water tends to drain quickly and downward, while clay soil holds the water longer and spreads it outward.
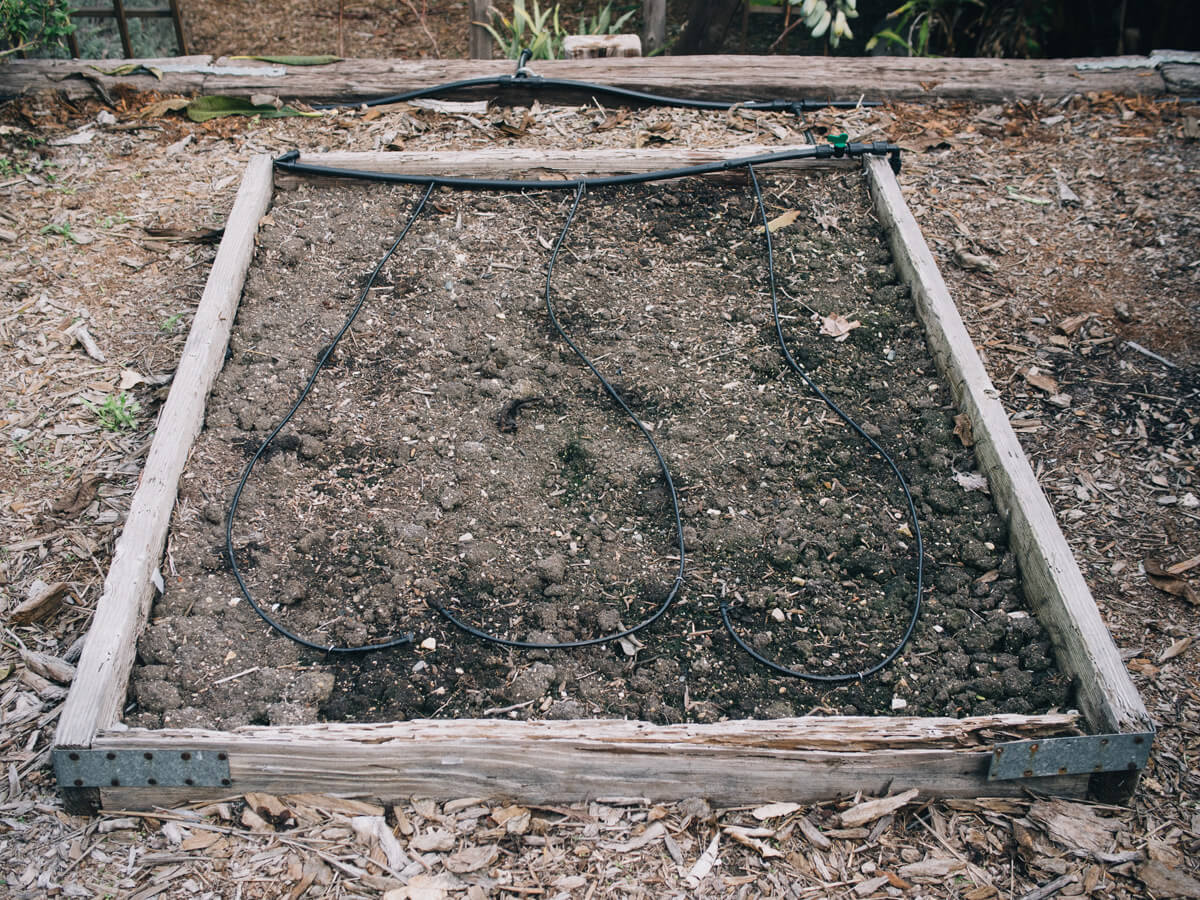
In general, vegetable crops need 1 inch of water a week. What does that mean, anyway?
With these particular driplines, which have 1/2 GPH emitters every 12 inches, that roughly equates to 90 minutes per week of watering. How you dole out those minutes depends on your soil: loam can get away with a once weekly watering, while clay responds better to three times a week.
But there are exceptions. I tend to water daily for shorter durations when my seedlings are just starting, then gradually transition to three times a week for longer durations when they’re more established.
The “1 inch of water a week” scenario should only be considered a starting point. In the summer, you’ll likely increase your output and in periods of rain, you’ll need to adjust accordingly.
Set your irrigation to run early in the morning and watch your plants for signs of stress after a week. If you can’t tell by sight alone how your plants are doing, you can dig down and gauge with your hands; the first 4 to 6 inches should feel evenly moist.
Step 7: Mulch your garden.
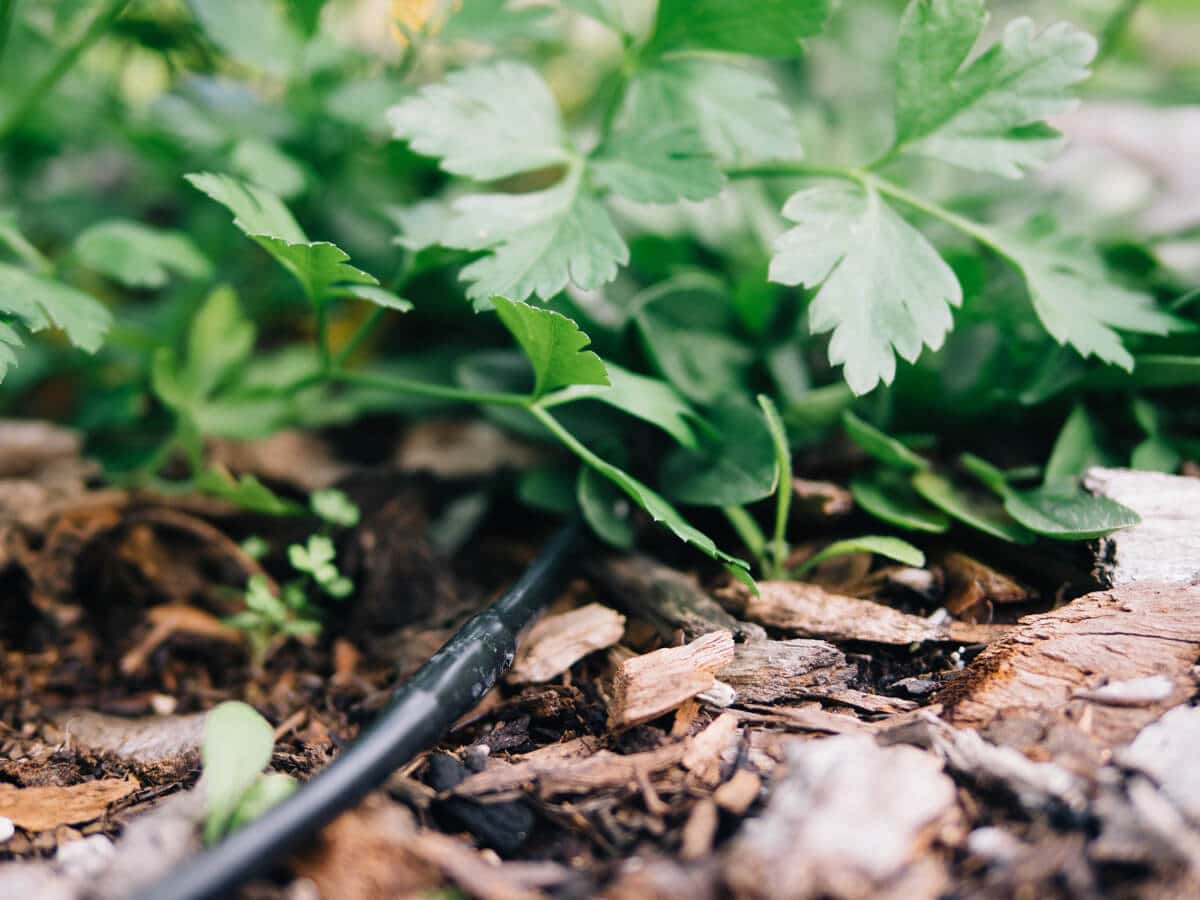
Drip irrigation components don’t last indefinitely; the plastic will eventually wear down but you can prolong the life of the system by sheltering it from the elements. Mulch not only the driplines in your beds (along with your plants), but also the mainline tubing and micro tubing outside of your beds.
Step 8: Hurrah! You’re done — but there’s always work to keep an eye out for.
Having an automatic system doesn’t mean you can ignore your garden now. Always check your system periodically to ensure it’s fully functional.
Check for leaks on the faucet assembly, replace the timer battery as needed, make sure your dog hasn’t used the mainline tubing as its chew toy.
Remember to adjust your timer with the seasons to account for added (or lack of) precipitation.
So, are you ready to get started?
Brought to you by DripWorks. Thank you for supporting the small businesses that support Garden Betty.
This post updated from an article that originally appeared on February 4, 2015.







Any chance you can get us a new coupon code
Let me check on that! 🙂 If they’re willing to offer a discount, the post will be republished with an updated coupon code.
Thank you so much
In all of my reading and planning, this is exactly what I was looking for and would’ve saved me so much time! I wish I could have found it earlier in my process, but finally I can show my wife exactly what our setup will look like! (And the confirmation of my design is sooooo welcome!)
So glad it’s helpful to you! A good drip system requires so much thinking ahead, and I also found it difficult to find a guide like this when we were planning ours.
About how far from the faucet can you run the mainline tubing do you think?
That really depends on your water pressure. If you’re using DripWorks’ system, you can call or email them for assistance. They’re great with the technical details.
nicely described. thank you
I really appreciate you going through how to set up my irrigation piping. I especially liked the idea of installing shut off valves for each of my beds. This way I only have to hook up one pipe to the hose and can just shut off the water to individual beds. A genius idea, and I’m kind of embarrassed I didn’t even think of it.
Charlie Bourgeois liked this on Facebook.
Laura Willson liked this on Facebook.
Angie Smith liked this on Facebook.
Greg Hadel liked this on Facebook.
Gwenyth Elliott liked this on Facebook.
Nelly Chu liked this on Facebook.
Terri Misch liked this on Facebook.
Patty Nichols liked this on Facebook.
RT @theGardenBetty: Get your garden ready for spring (and get a promo code!). Drip Irrigation: Assembling and Installing Your System http:/…
Get your garden ready for spring (and get a promo code!). Drip Irrigation: Assembling and Installing Your System http://t.co/ylHkpC5iQ5
Automate your garden for spring. Drip Irrigation: Assembling and Installing Your System http://t.co/oHtE5wJ9fE #gardenchat
Want to order one? I’m offering an exclusive code! Drip Irrigation: Assembling an Installing Your System http://t.co/UR9LRDF5fC #gardenchat
RT @theGardenBetty: A step-by-step on installing a @dripworksusa kit. Drip Irrigation: Assembling and Installing Your System http://t.co/p0…
RT @theGardenBetty: A step-by-step on installing a @dripworksusa kit. Drip Irrigation: Assembling and Installing Your System http://t.co/p0…
A step-by-step on installing a @dripworksusa kit. Drip Irrigation: Assembling and Installing Your System http://t.co/p0habePS7C #gardenchat
An irrigation kit gives you everything you need. Drip Irrigation: Assembling and Installing Your System http://t.co/2O5qcsvxsk #gardenchat
RT @H2oTrends: @thegardenbetty gr8 article on drip http://t.co/itDM7NIkgz you should join me and @dripworksusa on #landscapechat this Wed …
@thegardenbetty gr8 article on drip http://t.co/itDM7NIkgz you should join me and @dripworksusa on #landscapechat this Wed at #11 pst
Keep reading – I’m offering a special @dripworksusa discount! Drip Irrigation: Assembling and Installing Your System http://t.co/Ba2IOPluqq
Blogged on Garden Betty: Drip Irrigation: Assembling and Installing Your System http://t.co/iKRQNvf0l5